


Table of contents
Imagine you teach yoga classes and want students to buy a class pass straight from your registration form, using the PayPal account they already trust. With the PayPal integration, you connect your PayPal Business account to IvyForms once, add a payment field to your form, and customers pay with PayPal without leaving your site. This article explains how to enable the integration, connect your account in Sandbox or Live mode, and set up the Payment Method field.
The PayPal integration is available in the Essentials plan of IvyForms and higher. It requires IvyForms Pro to be installed and activated alongside the free IvyForms plugin.
To connect PayPal, your website must be publicly accessible with a valid domain, and you need a PayPal Business account. PayPal connections are not supported on local or localhost installations, because PayPal needs a publicly reachable URL to send payment updates back to your site. Live payments also require your site to use HTTPS. If you only want to test the integration first, you need a PayPal sandbox account instead of a real one.
If you are building your site locally, you will not be able to connect PayPal until the site is moved to a live server with a public domain.
You enable PayPal in IvyForms → Integrations by turning on the toggle next to PayPal. Until it is enabled, the PayPal card shows a Learn more button. As soon as you switch it on, you are taken straight to the PayPal settings, and the button on the card changes to Go to settings so you can get back there quickly later.
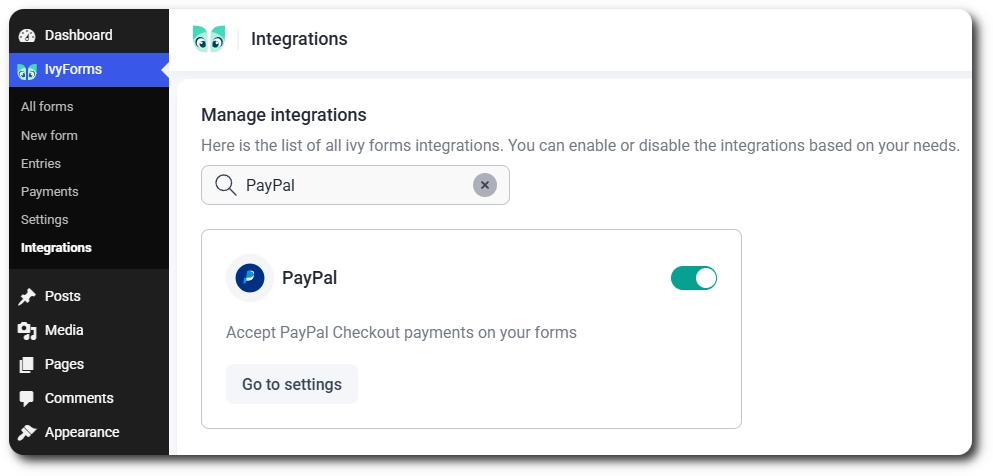
You connect your account in IvyForms → Settings → Payments → PayPal. First, choose an Environment from the dropdown, either Sandbox or Live, and then click Connect with PayPal. This opens the PayPal login page, where you log in with your account or click Sign Up to create a new one. After you log in, you are returned to IvyForms with your account connected.
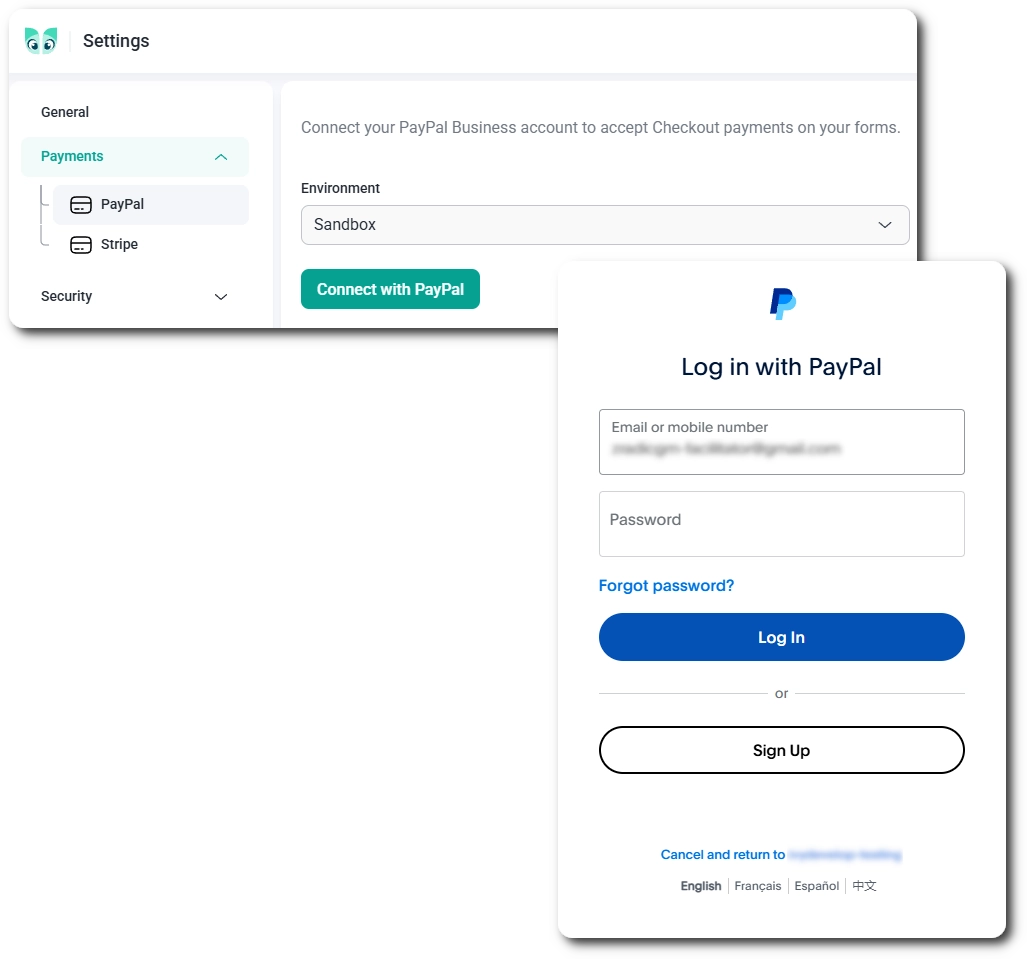
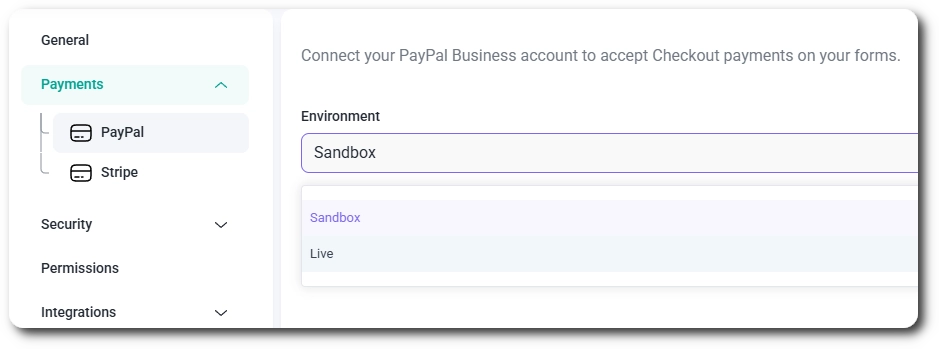
Sandbox is a testing environment where you can try the whole payment flow with PayPal test accounts and no real money changes hands. Live processes real payments from real PayPal accounts. Use an account that matches the environment you selected: a sandbox account for Sandbox, and your PayPal Business account for Live.
After the connection is complete, you are returned to IvyForms → Settings → Payments → PayPal, where your connected account details are displayed. The Account name, Merchant ID, and Environment fields are read-only and cannot be edited in IvyForms. Below them, you will find the Disconnect PayPal button.
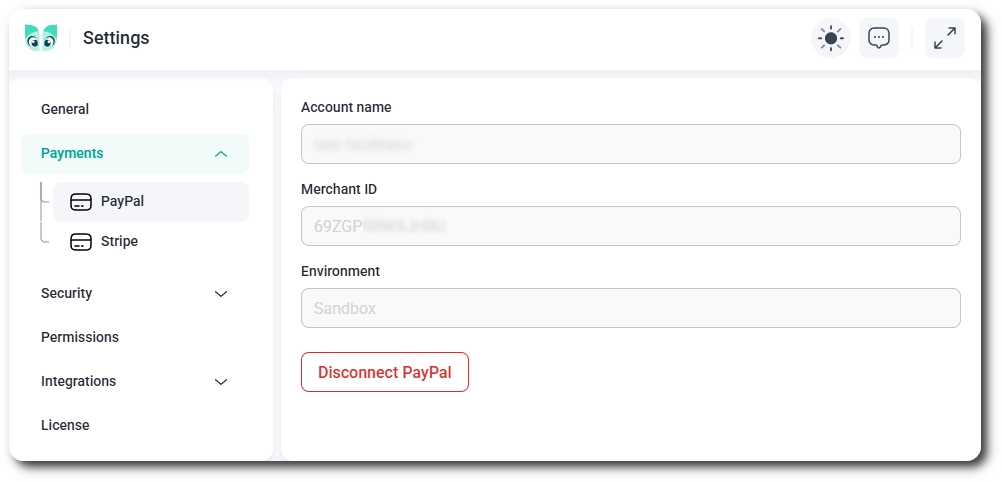
You switch environments by first clicking Disconnect PayPal. Once the account is disconnected, the Environment dropdown becomes available again, so you can pick the other environment and connect again. The same steps apply when you move from Live back to Sandbox.
You disconnect PayPal by clicking Disconnect PayPal, which removes the connection from your site. Forms that use the Payment Method field will no longer be able to take PayPal payments until you connect an account again. If access is removed from the PayPal side instead, IvyForms detects it, shows a warning that PayPal is disconnected, and sends an email to the site administrator.
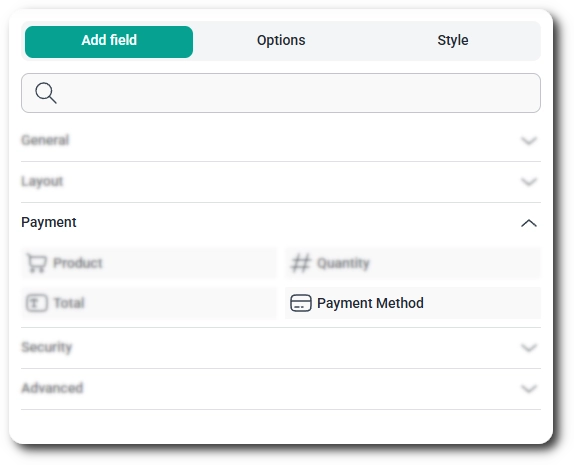
You add the field from the form builder by opening the Add field tab, expanding the Payment section, and clicking Payment Method. For details on what the field does and what it depends on, see the Payment Method field documentation. Once the field is added, select it in the preview to open its configuration options.
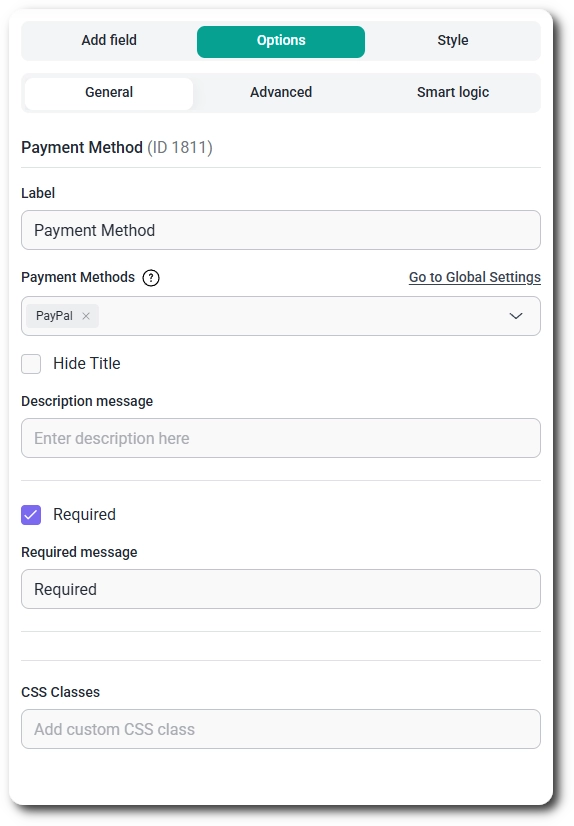
Selecting the field opens the Options view, where the settings are organized into three tabs: General, Advanced, and Smart logic. The options below apply when PayPal is the selected payment method.
The General tab shows the field name and its ID, followed by the core options for the field.
The Advanced tab is currently empty when PayPal is selected, so there is nothing to configure there. Layout and appearance can be adjusted through the form’s Style tab or with custom CSS classes.
The Smart logic tab lets you show or hide the Payment Method field based on conditions from other inputs in the form. Once enabled, you define rules that decide when the field is displayed, and the Conditional match setting controls how those rules are evaluated.
For example, you can show the payment field only when a visitor selects a paid service, and hide it for free options. For more details on conditions and values, see the conditional logic documentation.
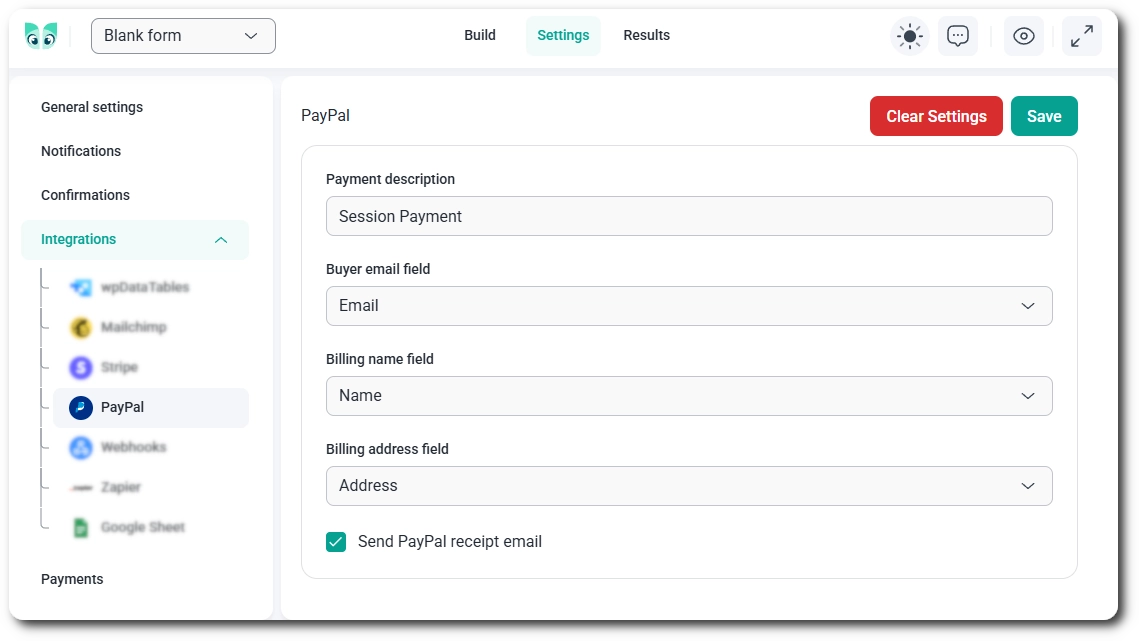
You configure PayPal for an individual form in the form’s Settings tab, under Integrations → PayPal. The global connection gives IvyForms access to your PayPal account, and these settings control how each form uses it. Click Save when you are done, or Clear settings to reset the panel.
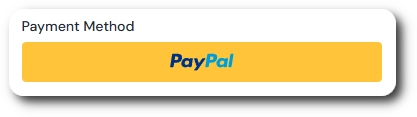
With PayPal selected, the Payment Method field appears on the front end as a PayPal button. Customers pay with their PayPal account, so no card details are typed into your form. When the customer clicks the button, IvyForms first checks that the required fields in the form are filled in, and then PayPal opens so the customer can log in and approve the payment. After that, the customer submits the form to complete the order.
When the customer submits the form, IvyForms checks that the approved PayPal payment matches the form total and currency, and then completes the payment. If it succeeds, the entry is created and the payment is recorded. If the customer submits without approving the payment in PayPal first, they are asked to complete the PayPal checkout before continuing.
Completed payments are listed in IvyForms → Payments, where you can search and filter them and open each payment in PayPal. For more details, see the Payments documentation.
Use Sandbox while you build and test your form, and switch to Live only when you are ready to accept real payments, remembering that switching means disconnecting and connecting again. Live payments require a public site with HTTPS, and every successful Live payment is a real charge to your PayPal Business account.