
Table of contents
Say you run an online equipment order form where customers pick a keyboard and a printer, and you want the total to appear on screen as soon as they choose; the Calculated Field does exactly that. It works out a value automatically from a formula you write, using the numbers and prices from other fields in the form. This article covers where to find the field, how to build and validate a formula, and how to configure its settings in the form builder.
The Calculated Field is available only in the Pro version of IvyForms, not in Lite, with a Pro Essentials license or higher.
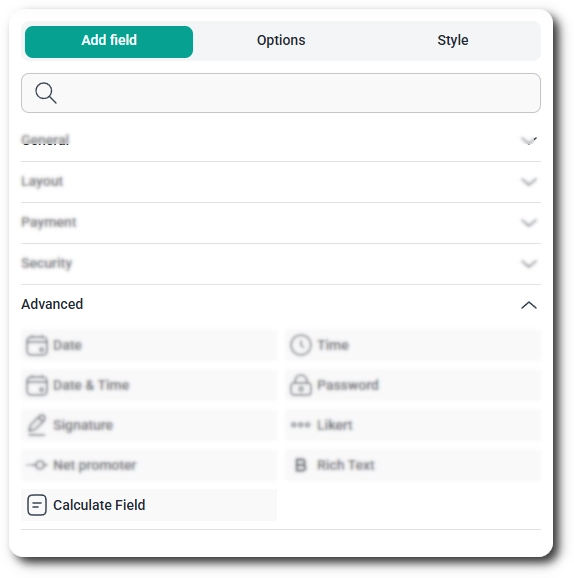
You add the Calculated Field from the Advanced section in the left panel of the IvyForms builder, where it is listed as Calculate Field. Expand the section, then drag the field onto your form to drop it in place, or simply click on it to add it to the bottom of the form.
You can use Number, Slider, Product, Quantity, Total, Checkbox, and Radio button fields in a formula. There is no “include in calculation” setting to switch on for each field; every supported field on the form is automatically available once you add a Calculated Field.
A Product field contributes the price of the option the visitor selects, while a Checkbox adds up the values of every selected option.
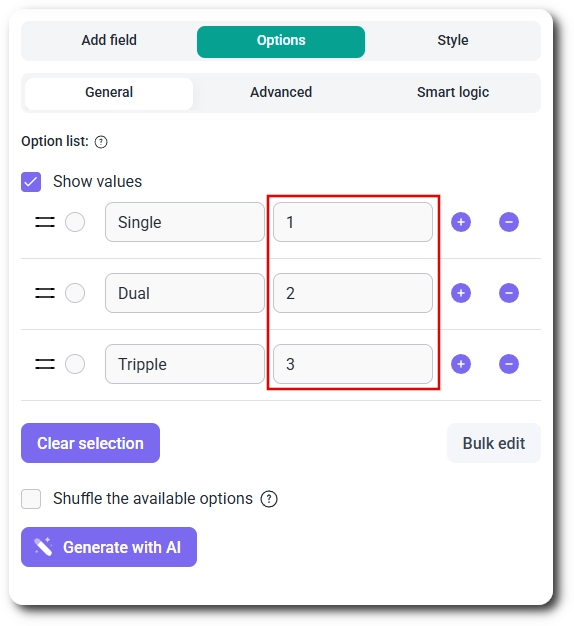
Checkbox and Radio button fields only work in a formula when the stored value of each option is a number. Turn on Show values in the field’s Option list and enter a number as the value.
Once the field is on the form, click it to open the panel on the left, which switches from Add field to Options. From there, the General, Advanced, and Smart logic tabs hold everything you can adjust for the Calculated Field.
The General tab shows the field type (Calculated Field) and the field’s ID. It also holds the label settings and the formula itself. The settings are:
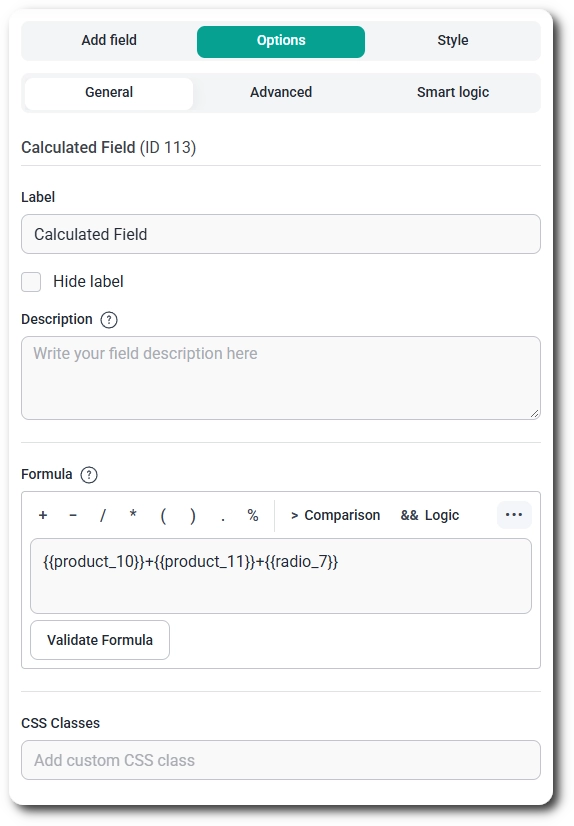
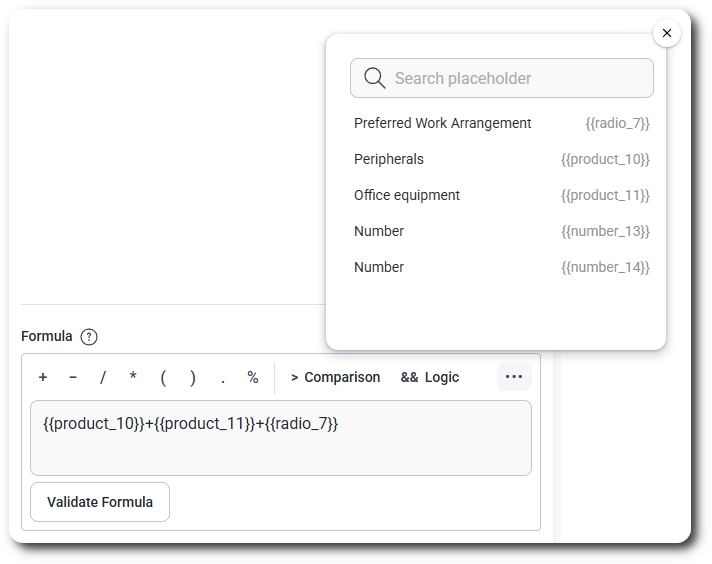
You build a formula in the Formula editor by typing it manually or by inserting fields as placeholders, which are replaced with each field’s value on the form. To insert a field, click the ••• button at the right of the editor toolbar, search for the field by name, and select it. For example, adding two product fields produces {{product_10}} + {{product_11}}.
The toolbar also gives you buttons for the basic operators: add (+), subtract (-), divide (/), multiply (*), brackets, decimal point, and modulo (%), which returns the remainder of a division. Two dropdowns add more advanced options:
&&), Or (||), and Not (!).A comparison or logic operator returns 1 when the condition is true and 0 when it is false, so the formula always ends up as a single number. Dividing by zero returns 0.
You validate a formula by clicking Validate Formula directly below the editor, which checks the syntax, the operators, the referenced fields, and the opening and closing brackets. If everything is correct, a Formula is valid. message appears in green below the editor. If something is wrong, a message explains the issue, such as an empty formula, a missing or unbalanced bracket, an unknown field reference, or an unsupported character or operator.
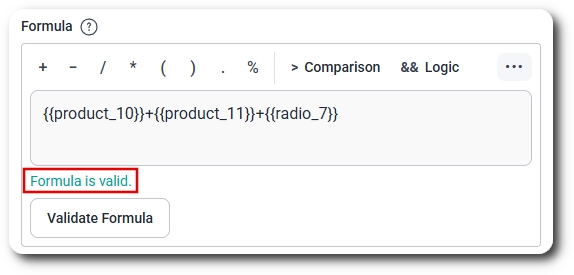
You can’t save a form that contains a Calculated Field with an invalid formula. The error is shown inline on that field, so correct the formula and validate it again before saving.
The Advanced tab controls how the calculated result is formatted when it appears on the form. The options are:
$.USD.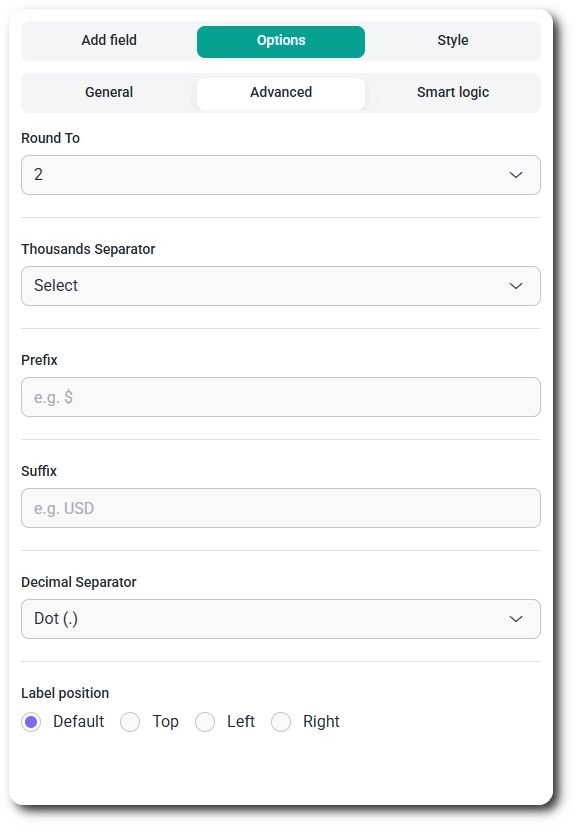
Smart logic lets the Calculated Field appear only when conditions tied to other fields are met, so it relies on your form having more than one field. It starts on No, which keeps the field always visible; switch it to Yes, and a Conditional match setting shows up. Pick Any to reveal the field when at least one condition is satisfied, or All to reveal it only when every condition is met at once. For the full walkthrough, see the conditional logic documentation.
On the front end, the Calculated Field shows its label and the result of the formula, and the result updates automatically whenever a visitor changes a value in the fields it uses. In the equipment order example, choosing a keyboard and a printer displays the combined total without the visitor doing anything extra.
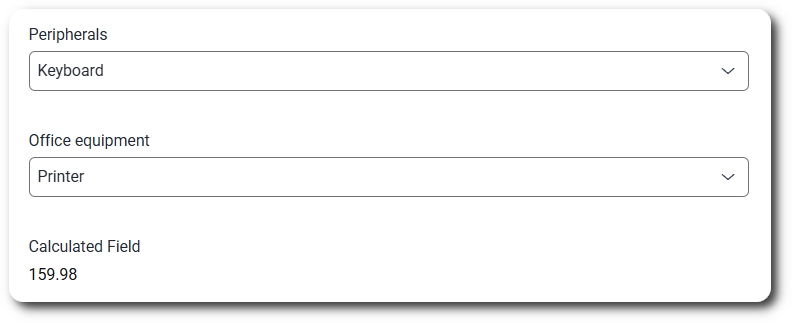
The result is formatted using your Advanced settings, so rounding, separators, prefix, and suffix appear exactly as you configured them. When the form is submitted, IvyForms recalculates the value and saves it with the entry. To customize colors, spacing, typography, and the overall form appearance, see the style tab documentation.