


Table of contents
Say you sell something through several IvyForms registration forms and want to check who has paid without opening Stripe or PayPal every time. The Payments page gives you one table with every payment collected through your forms, so you can search, filter, and export them without leaving WordPress.
The Payments page lists every payment customers have made through your forms, from all connected payment providers, in a single table. You open it from IvyForms → Payments. A payment appears here after a customer pays through the Payment Method field, so you need a payment integration such as Stripe or PayPal connected first.
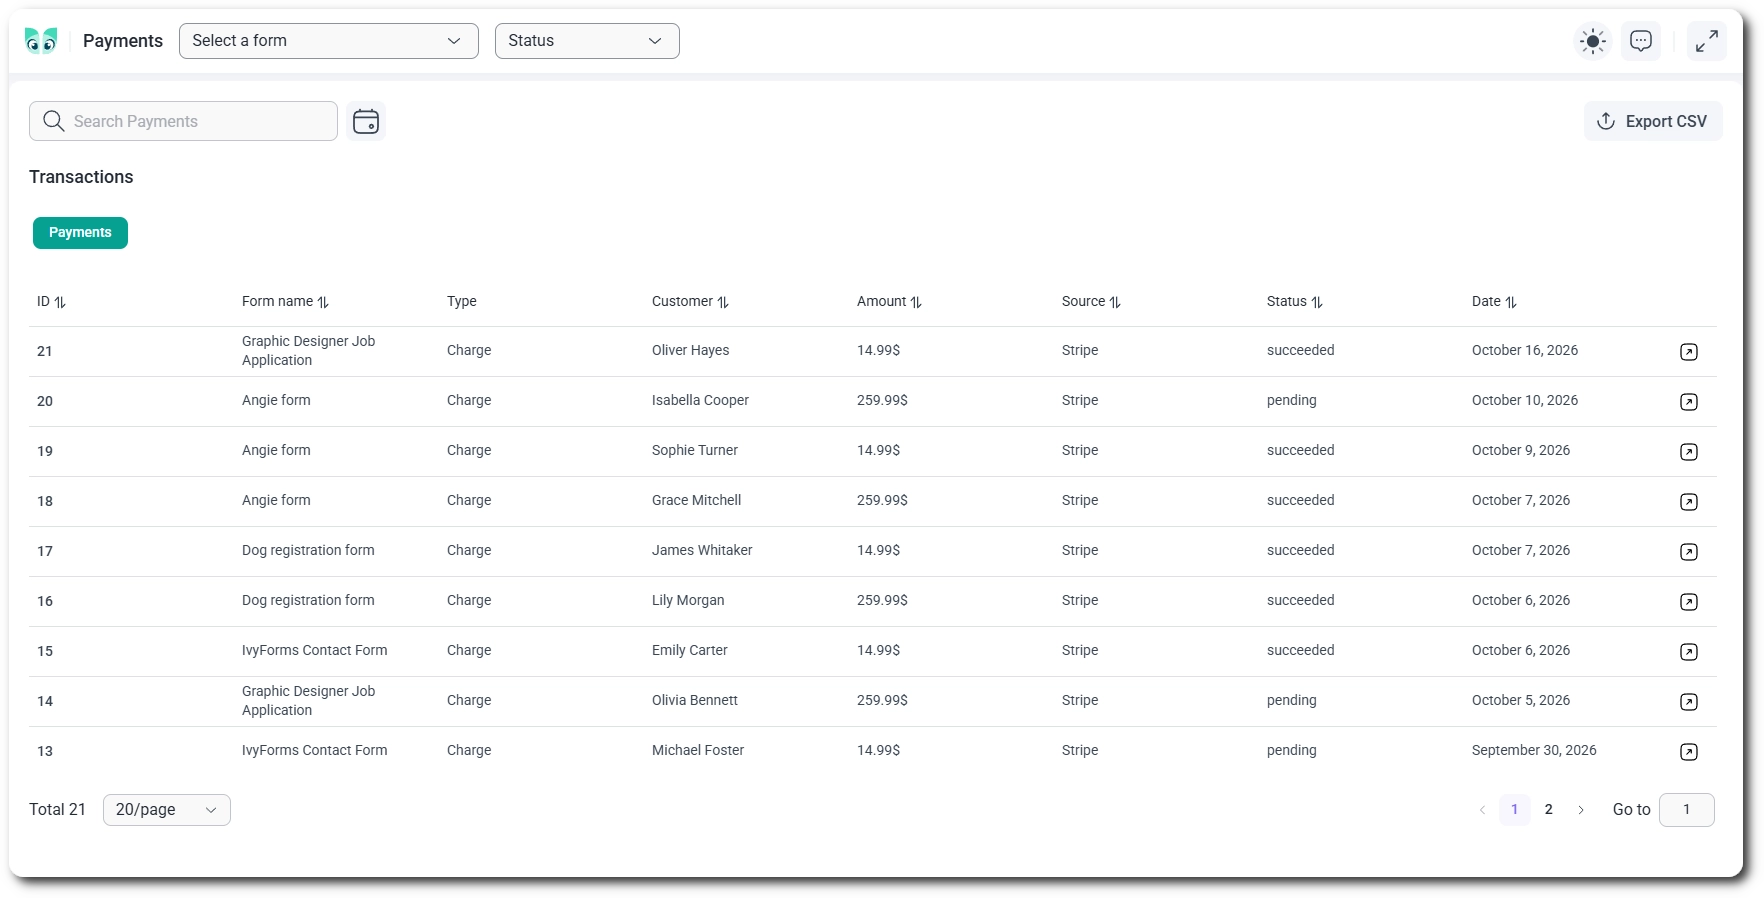
Each row in the table is one payment, and the columns give you the key details at a glance.
At the end of each row, an arrow icon opens the payment in your provider’s dashboard, for example View in Stripe or View in PayPal, where you can see the full payment details.
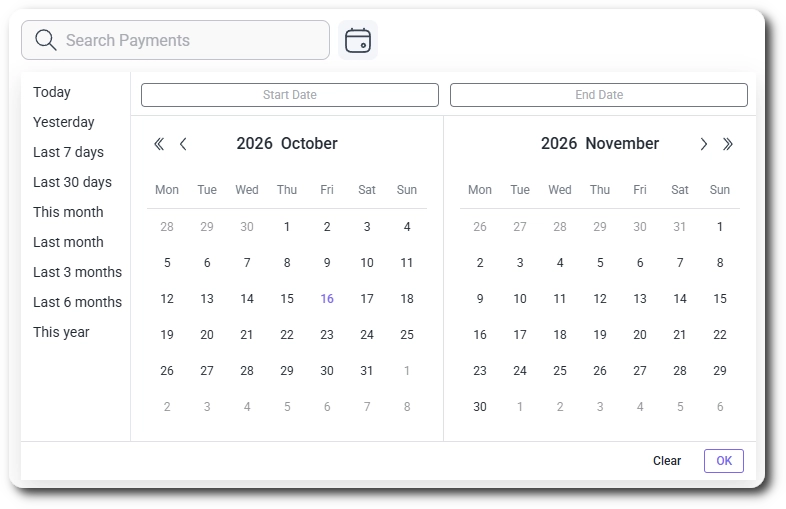
You can find a specific payment by searching or by narrowing the table down with filters. Type in the Search Payments field to find payments by transaction ID, form name, or customer name. To show payments from one form only, choose it in the Select a form dropdown at the top of the page. To show payments from a specific period, click the calendar button next to the search field and pick a start and end date.
If nothing matches your search or filters, the table shows a message saying so, with a Reset filters button that clears everything and brings the full list back.
You sort the table by clicking the arrows next to a column title. You can sort by ID, Form name, Customer, Amount, Source, Status, and Date; the Type column is not sortable. By default, the newest payments are shown first. At the bottom of the table, the total number of payments is shown on the left, together with a dropdown where you can choose to show 10, 20, 30, or 40 payments per page. On the right, you can move between pages with the page numbers or jump straight to a page with the Go to field.
You export payments by clicking the Export CSV button in the top right corner of the table, which downloads a file named ivyforms-payments- followed by the current date. The export applies the search, form, and date range you have selected, and it includes all matching payments, not only the page you are looking at, up to 10,000 payments. Besides the columns shown in the table, the file also contains the Transaction ID and a link to the payment in your provider’s dashboard.
You can see a payment from inside the entry it belongs to. Open the entry, either by clicking the payment’s ID in the Payments table or from the entries list, and look for the Payment section. It shows the payment method, amount, date, and transaction ID, along with a link that opens the payment in your provider’s dashboard. For more on working with entries, see the Managing a single entry documentation.
The Payments page is your overview of everything customers have paid through your forms. Use the search, form, and date filters to find a payment quickly, check the status of each one, export the list to CSV when you need it elsewhere, and open any payment in your provider’s dashboard for the full details.