
Table of contents
Notifications in IvyForms allow you to automatically send emails after a form is submitted. These emails can be sent to administrators, users, or any custom recipients, and can be fully customized using static values or dynamic placeholders.
Notifications are configured per form, meaning each form can have its own email setup and behavior.
To configure notifications, open your form and navigate to the Settings tab, then select Notifications from the left-side panel.
By default, IvyForms includes an Admin Notification Email that is enabled and used to notify the website owner when a new submission is received.
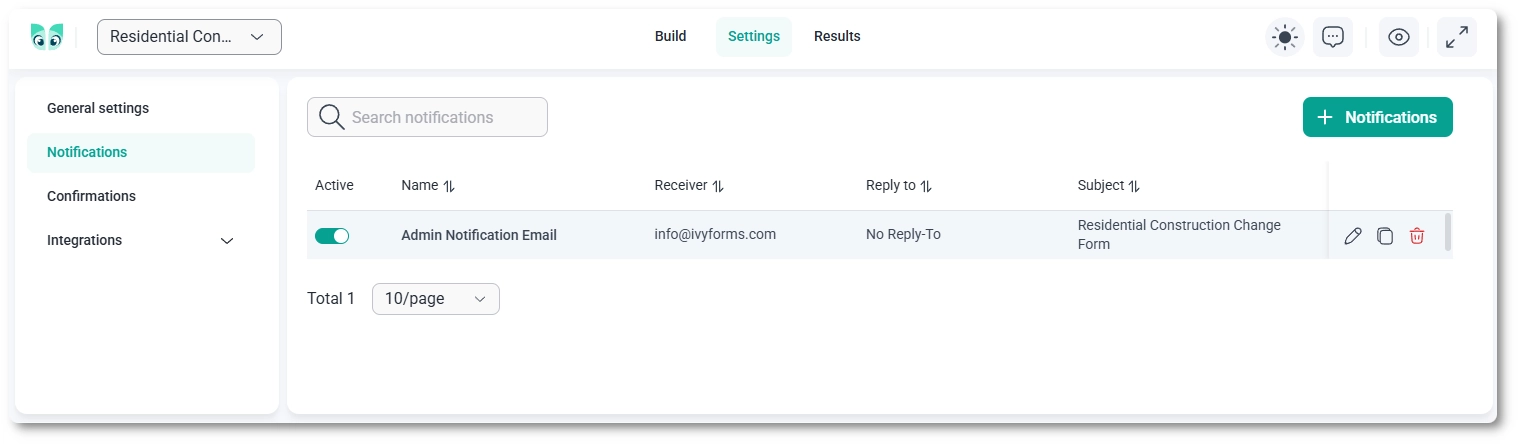
You can create additional notifications by clicking the + Notifications button. This allows you to define different email scenarios, such as sending confirmation emails to users or notifying multiple recipients.
Each notification in the list includes the following actions:
You can also enable or disable each notification using the toggle in the Active column.
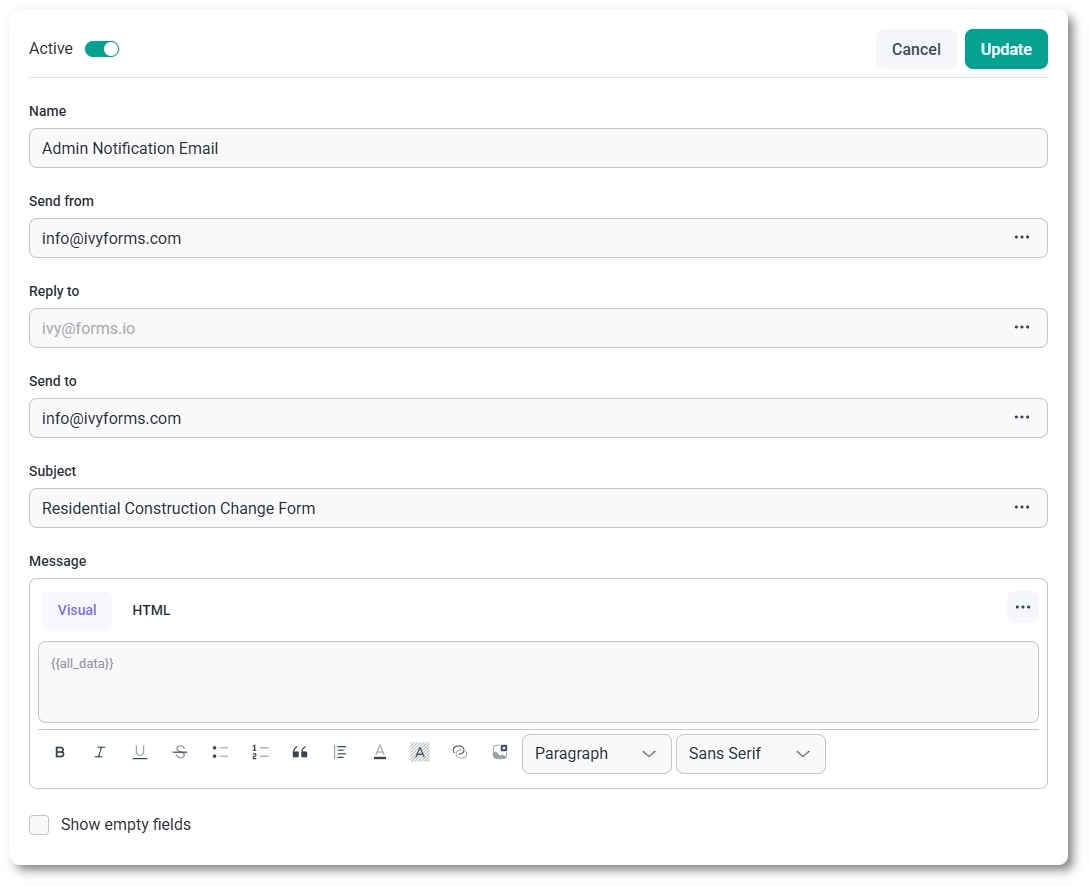
When editing a notification, you can configure how the email is sent and what it contains. Each notification includes fields such as sender, recipient, subject, and message content.
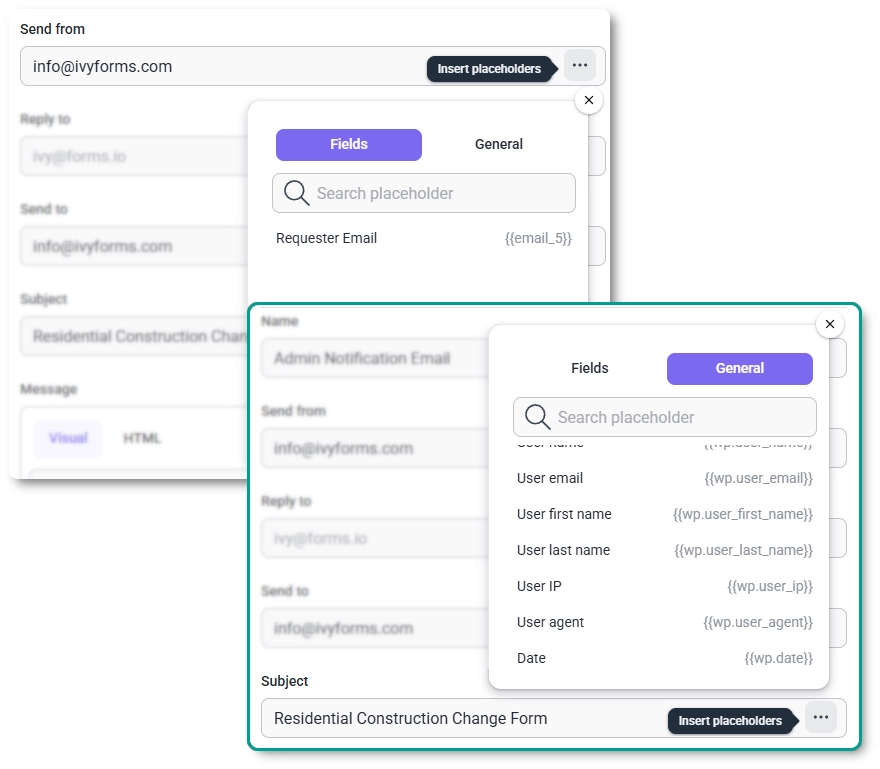
IvyForms allows you to use dynamic placeholders in notification fields to automatically insert values from form submissions or system data.
When clicking the three-dot menu next to fields like Send from, Reply to, Send to, CC, BCC or Subject, a placeholder selector will appear with two tabs::
For example, if your form contains an email field, selecting it as a placeholder allows IvyForms to automatically use the submitted email address for sending or replying to messages.
Yes, all email fields such as Send from, Reply to, Send to, CC, and BCC can also be filled manually.
This means you can use fixed email addresses like [email protected], or combine static values with dynamic placeholders depending on your needs.
The Subject field is automatically populated with the form name by default, but it can be customized. You can also use placeholders to dynamically include values from the form or system data.
The Message field defines the content of the email. By default, it includes the {{all_data}} placeholder, which outputs all submitted form data.
You can fully customize the message using the visual editor or switch to HTML mode for advanced formatting. This allows you to structure the email exactly how you want, including specific fields, labels, and formatting.
The Show empty fields option controls whether fields without values are included in the email. When enabled, all form fields will appear in the message, even if they were left empty. When disabled, only fields with submitted values will be included.
You can attach files that visitors upload through a File Upload field to a notification by turning on the Attach uploaded file(s) to this notification toggle in the notification settings. The files from that submission are sent as real email attachments instead of links, so the recipient can open them straight from the email. The toggle appears only when your form contains at least one File Upload field, and it is a Pro feature.
The option is off by default and is set for each notification separately. That means you can attach files to the admin notification and leave them out of the confirmation email sent to the visitor, or the other way around.
If your form has more than one File Upload field, a Select file upload fields dropdown appears under the toggle. Choose which fields to attach; only the files uploaded through those fields are included. With a single File Upload field, it is attached automatically.
Uploading large files may affect email deliverability, since many mail servers reject or filter heavy attachments. If you expect large uploads, keep the toggle off and let recipients open the files from the entry instead.
Conditional logic is available only in the Pro version of IvyForms, not in Lite.
Each notification has a Smart logic toggle at the bottom of the editor that sends the email only when the visitor’s answers match conditions you set, instead of on every submission. Turn it on and you build rules from a form field, a condition such as equals, and a value, adding or removing rules with the purple plus and minus buttons. The Conditional match option controls how the rules combine:
For example, if your form has a checkbox like “I want to receive confirmation via email,” you can set the visitor confirmation notification to send only when that box is checked, so anyone who opts out never receives it. The rules compare the stored field value the same way field-level logic does; for the full detail on conditions and values, see the conditional logic documentation.
Yes, you can add extra recipients to one notification with the CC and BCC fields instead of duplicating it for each person. Recipients in CC are visible to everyone who receives the email, so they can reply to all, while recipients in BCC stay hidden. Both fields accept several addresses separated by commas, and each one can be a fixed address such as [email protected] or a placeholder from the three-dot menu. For example, you can send the submission to the admin in Send to, copy the sales team in CC, and quietly copy a manager in BCC, all with the same subject and message.
Use CC and BCC when everyone should get the same email. If different people need different content, use the Duplicate action to create a separate notification for each.
Using multiple notifications allows you to create different email flows for different scenarios. For example, you can:
Each notification can have its own recipients, content, and logic, giving you full control over how form submissions are handled.