Table of contents
Webhooks are an integration available only in the Pro version of IvyForms, not in Lite.
When a candidate submits your job application form, you might want that entry to land instantly in a Zapier workflow that creates a task, updates a spreadsheet, and pings your team. The webhooks integration makes that possible: it sends each form entry to any external URL you point it at, with no extra connector plugins. Because you’re sending raw data to an endpoint you control, this feature is aimed at people who are comfortable working with webhooks and APIs; IvyForms sends the request, but creating and reading it on the receiving end is up to you and your chosen service. This article covers enabling the integration, adding a webhook to a form, and configuring the request.
You enable webhooks the same way as other integrations, from IvyForms → Integrations in your WordPress dashboard. Find Webhooks in the list and turn it on with the toggle. Once enabled, you set up webhooks individually on each form rather than globally, so turning the integration on here just makes it available in your forms.
To add a webhook, open the form and click Settings at the top, then go to Integrations → Webhooks. The panel is empty until you create one, so click Add Webhook to open the editor.
Each webhook starts with three basics: the Active toggle turns it on or off, the Webhook name (required) is a label for your own reference, and the Webhook URL (required) is the endpoint your external service gives you, such as a Zapier catch hook. Everything below those controls how the data is sent.
Below the URL, you control how IvyForms sends the data using the request method, the request format, and an optional secret.
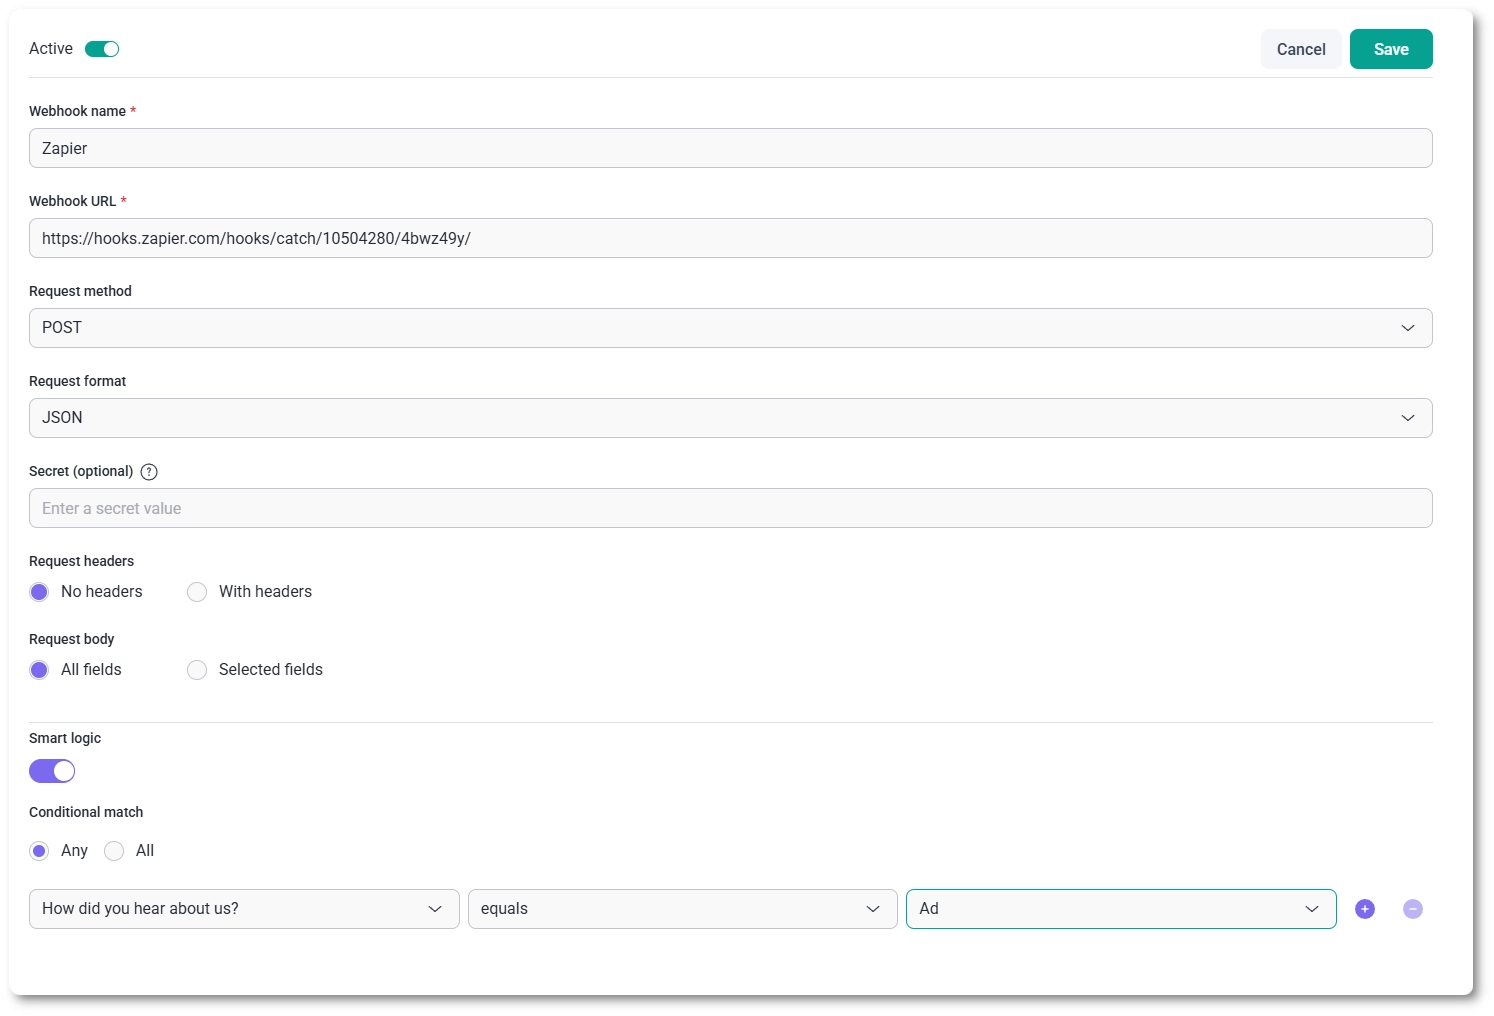
The Request method tells the endpoint what kind of action you’re sending, and POST is the usual choice for webhooks. The options are:
The Request format sets how the payload is encoded. JSON sends the data as a JSON object, which is what services like Zapier, Make, and Slack expect, while Form Data sends it as form-encoded key/value pairs for endpoints that require a form-style post.
Only fill in the Secret if your API requires webhook signature verification (HMAC). Most third-party services like Zapier, Slack, and Make don’t need it, so you can leave it blank. If you do provide a secret, IvyForms uses that same secret to sign every request, letting the receiving service confirm the payload genuinely came from you.
Two more settings let you shape exactly what gets sent: Request headers and Request body.
Headers default to No headers; switch to With headers and a row appears with Header name and Header value, plus a + on the right to add more. The Header name is a dropdown of standard HTTP request headers; for most webhooks the ones you’ll reach for are Authorization (to pass an API key or token) and Content-Type. The Header value can be typed in manually, or you can use the three-dots menu on the right to insert a placeholder pulled from this form’s field entries or general data.
The Request body decides which fields are sent. All fields (the default) sends every submitted field, while Selected fields lets you build a custom payload. With Selected fields on, each row has a Field name, where you enter the parameter key the endpoint expects, and a Field value, which you can type in or fill with a placeholder using the three-dots menu.
Yes; the Smart logic toggle at the bottom of the editor fires the webhook only when the visitor’s answers match conditions you set, instead of on every submission. Turn it on and you build rules from a form field, a condition such as equals, and a value, adding or removing rules with the purple plus and minus buttons. The Conditional match option controls how the rules combine:
For the full detail on conditions and values, see the conditional logic documentation.