Table of contents
Multi-page forms are available only in the Pro version of IvyForms, not in Lite.
A long job application is far less intimidating when it’s broken into steps like Basic details, Work details, and Review, each on its own page with a progress indicator at the top. That’s what multi-page forms give you: you split a form’s fields across several pages, and visitors move through them with Previous and Next buttons. This article covers adding and arranging pages, choosing how the progress indicator looks, and customizing the navigation buttons.
Every form starts with a single Page 1 tab at the top of the builder canvas, and each page holds the fields you place on it while that page’s tab is active. You can add a page two ways: click the + next to the last page tab, or open the Options panel and use the purple + in the Page List. The Page List is also where you organize pages, letting you:
You’re always editing the page whose tab is currently active, so the fields you add land on that page only. To build out another page, click its tab at the top of the canvas first, then add fields the usual way: click a field in the left panel to drop it at the bottom of the page, or drag it into the exact position you want. Switching tabs swaps the canvas to that page’s fields, so you can move between pages freely as you build.
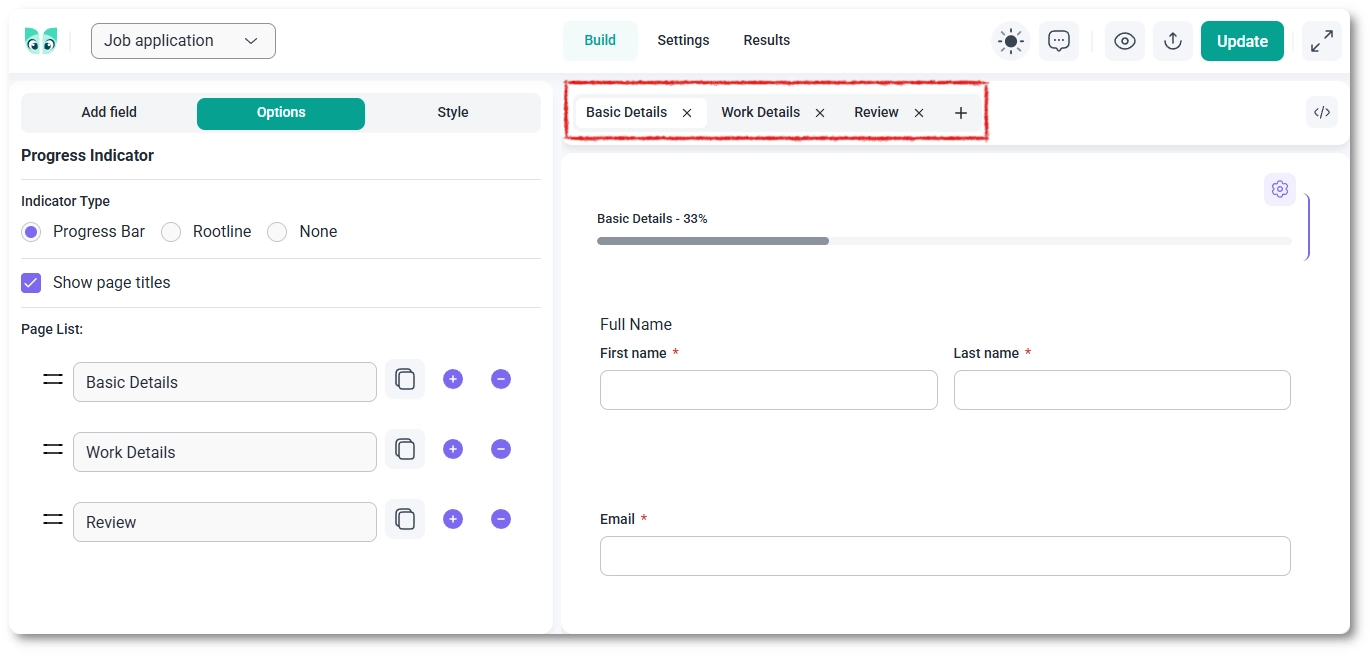
Click the progress indicator at the top of the canvas (the bar labeled Page 1 – 33% in the screenshot) to open the Progress Indicator options on the left. Under Indicator Type you can choose Progress Bar, Rootline, or None, and the available options change with each choice.
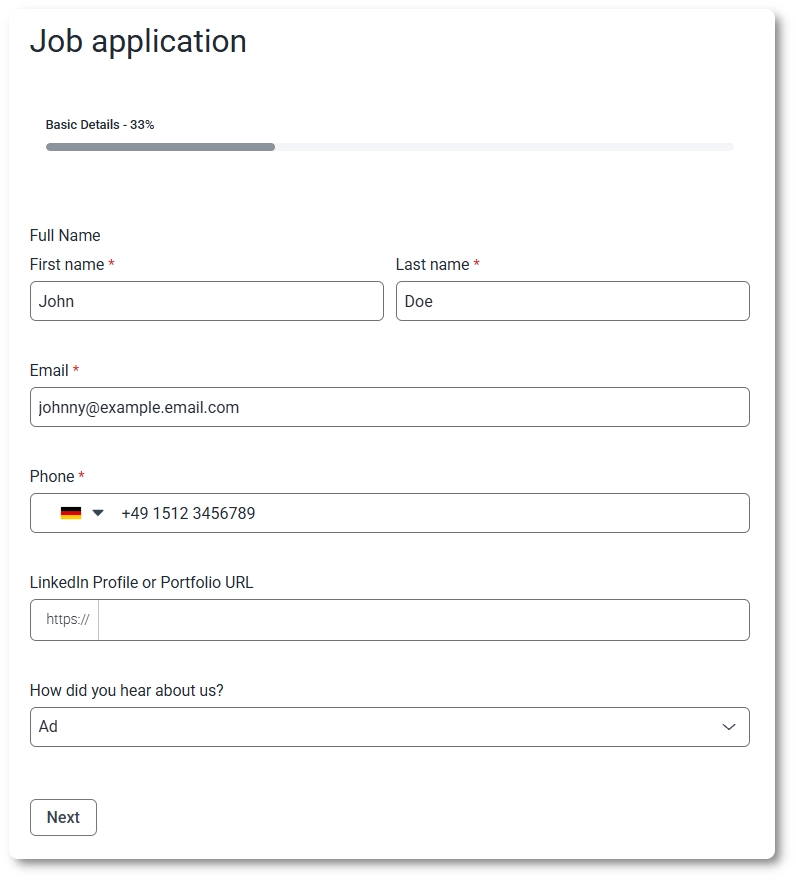
Progress Bar is the default and displays a filling bar with the page name and completion percentage, for example Page 2 – 67%, which updates as visitors move through the form. Tick Show page titles to display each page’s name, and manage the pages themselves from the Page List below.
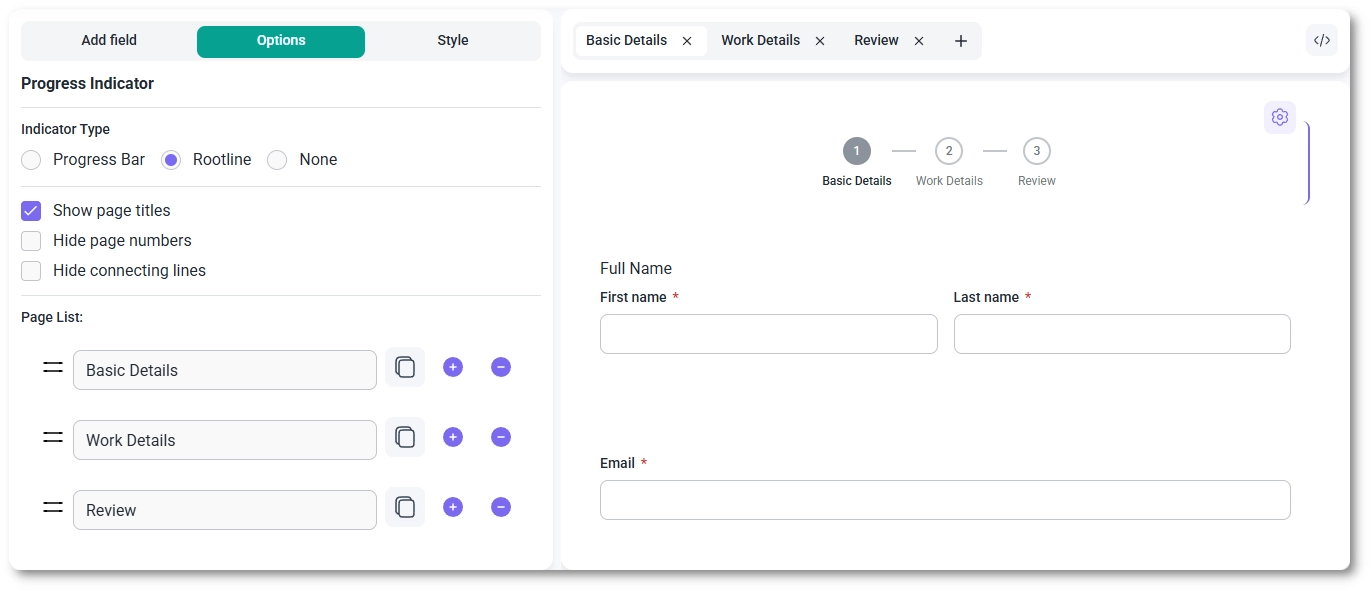
Rootline replaces the bar with a row of numbered circles joined by connecting lines, one circle per page. It keeps the Show page titles option and adds two more: Hide page numbers removes the numbers inside the circles, and Hide connecting lines removes the lines between them, so you can pare the indicator down to just what you want visitors to see.
None lets you keep the form split into pages without showing any progress indicator to visitors. The pages and the Previous and Next navigation still work exactly the same; visitors just won’t see a bar or rootline at the top.
You customize the Previous and Next buttons per page, the same way you add fields: switch to the page you want first, then hover over either button on the canvas and click the gear icon that appears to open Button Settings on the left. The buttons also follow each page’s position in the form, so the first page has no Previous button and the last page has no Next button. For the page you’re on, you can:
Button settings are easy to miss; they don’t open from the main Options tab, and they apply only to the page you’re on. Settings don’t carry across pages, so renaming Next to Forward on Page 1 won’t change it anywhere else; configure each page’s buttons separately.
With Group Buttons enabled and Button Position set, both buttons sit together in the chosen spot, so a Center setting places the grouped Previous and Next buttons in the middle below the page. To customize colors, spacing, typography, buttons, and the overall form appearance, see the style tab documentation.
Because multi-page forms are a Pro feature, disabling IvyForms Pro temporarily collapses the form into a single-page form on the front end. If you re-enable Pro without touching the form in the meantime, it switches straight back to its multi-page layout. The catch is updating the form while Pro is off: if you open the form and click Update while Pro is disabled, with or without making any changes, the form is permanently saved as a single-page form and will stay that way even after you turn Pro back on.
If you’re disabling IvyForms Pro only temporarily, do not open and Update your multi-page forms while it’s off, or they’ll be saved as single-page forms and won’t revert when Pro is re-enabled. Leave them untouched to keep the multi-page layout intact.