


Most WordPress sites reach for a plugin the moment they need a contact form. It works, but it is not the only way. You can create forms in WordPress without…
Table of contents
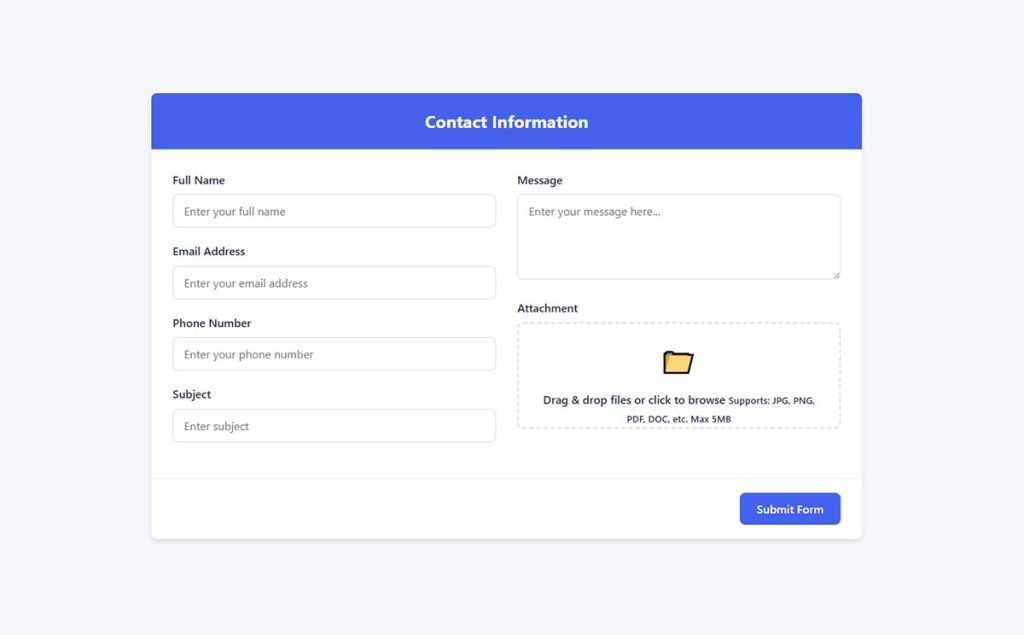
A WordPress form with file upload turns a basic contact form into something far more useful. Visitors can submit resumes, attach screenshots to support tickets, or send signed documents, all without leaving your site.
But getting file uploads right is trickier than dropping a plugin onto a page. Server limits, security risks, MIME type restrictions, and email attachment failures can break the experience fast.
This guide covers everything from choosing the right form plugin (WPForms, Gravity Forms, Contact Form 7, and others) to configuring PHP upload limits, locking down file type restrictions, and troubleshooting the most common errors. You’ll also learn how to use conditional logic, route files to cloud storage, and keep your uploads secure.
What Is a WordPress Form with File Upload?
A WordPress form with file upload is a frontend form that allows visitors to submit documents, images, PDFs, or other files through your website. It goes beyond a standard contact form by accepting file attachments alongside text inputs.
WordPress powers over 43% of all websites on the internet, according to W3Techs. And with over 60,000 plugins available in the WordPress directory, adding file upload functionality to any form takes minutes, not hours.
The typical use cases are straightforward. Job application pages need resume uploads. Support ticket systems require screenshot attachments. Client onboarding portals collect signed documents. Event registration setups sometimes ask for photo IDs or proof of payment.
Under the hood, every file upload form relies on HTML’s enctype="multipart/form-data" attribute. This tells the browser to package files as binary data inside the HTTP request. WordPress then processes those files server-side through PHP’s $FILES superglobal.
Your mileage will vary depending on which plugin you pick. Some give you a basic file input field. Others offer drag-and-drop upload zones, progress bars, and cloud storage routing.
But the core idea stays the same: a form field that accepts files, a server that stores them, and (usually) an email notification that tells you something arrived.
How File Uploads Work in WordPress Forms
The process looks simple from the visitor’s side. They click a button, pick a file, submit the form. Behind the scenes, several layers of PHP and server configuration are working together.
The HTTP Request
When someone submits a form with a file attached, the browser sends a multipart HTTP POST request. This is different from a regular form submission. The file data is encoded as binary and packaged alongside the text fields.
WordPress receives this request and hands the file data off to PHP for processing. The temporary file sits in the server’s temp directory until your code (or plugin) decides what to do with it.
Server-Side Processing
WordPress provides two core functions for handling uploads: wphandleupload() and mediahandleupload().
The first one processes the file and moves it to the uploads directory. The second does the same thing but also creates an attachment post in the WordPress media library. Most form plugins use a variation of wphandleupload() to keep submitted files separate from your media library.
By default, uploaded files land in wp-content/uploads, organized by year and month. Some plugins, like WPForms, store form submissions in their own subdirectory to avoid cluttering your media folders.
MIME Type and File Validation
Server-side validation is where things get tricky. WordPress checks the file’s MIME type against an internal whitelist of allowed types. If the file doesn’t match, the upload gets rejected.
Patchstack’s 2025 report found 7,966 new security vulnerabilities in the WordPress ecosystem during 2024, a 34% jump over the previous year. File upload vulnerabilities ranked as the third most common type, according to Wordfence’s analysis of 1,599 WordPress vulnerabilities.
MIME type checking alone isn’t enough. Attackers can spoof MIME headers. That’s why proper form security also checks file extensions and reads the file’s “magic bytes” (the first few bytes that identify the actual file type).
Best WordPress File Upload Form Plugins
The plugin you choose determines everything: how the upload field looks, what file types you can accept, where files get stored, and how secure the whole process is.
Here’s how the major free WordPress form plugins and premium options stack up for file upload functionality.
| Plugin | Active Installs | File Upload on Free Plan | Drag-and-Drop Upload |
|---|---|---|---|
| Contact Form 7 | 5+ million | Yes (basic) | No |
| WPForms | 6+ million | No | Yes (Pro) |
| Gravity Forms | Premium only | N/A | Yes |
| Fluent Forms | 500K+ | Yes | Yes (Pro) |
| Formidable Forms | 400K+ | Limited | Yes (Pro) |
| Ninja Forms | 800K+ | Via add-on | Yes (add-on) |
WPForms
WPForms sits at 6+ million active installations and is probably the most beginner-friendly option available. The drag-and-drop form builder makes adding a file upload field as simple as dragging it onto your form canvas.
The Pro version supports chunk uploading, which breaks large files into smaller pieces during transfer. This sidesteps most server timeout issues. You also get multiple file upload fields, custom allowed file types, and file size limits per field.
The catch? File uploads are locked behind the paid plans. WPForms Lite won’t cut it if you need this feature.
Contact Form 7
Contact Form 7 remains the most installed form plugin in the WordPress ecosystem. It’s completely free, no premium tier, no upsells. File uploads work through the [file] tag syntax.
The downsides are real, though. No visual builder. No drag-and-drop upload interface. CF7 loads its CSS and JavaScript on every page regardless of whether a form exists there. And the file upload field looks like the default browser file picker from 2005.
Still, if you’re comfortable with markup and want zero cost, CF7 handles basic file attachments just fine.
Gravity Forms
Premium-only, starting at $59/year. But Gravity Forms earns its price with multi-file upload fields, conditional logic per file field, and a mature ecosystem of third-party add-ons.
Agencies and developers tend to prefer Gravity Forms because the REST API and webhook integrations make it easy to route uploaded files wherever they need to go. I’ve seen developers build entire document management workflows around it.
Fluent Forms and Other Options
Fluent Forms deserves a mention because its free version is surprisingly generous. You get conditional logic, 65+ field types, and file upload support without paying anything.
Ninja Forms takes a modular approach (buy individual add-ons or bundles), while Formidable Forms stands out for displaying submitted data on the frontend through its “Views” feature. WS Form is worth a look if you’re a developer who wants lightweight markup and full control.
Free vs. Premium File Upload Features
What you get for free: Contact Form 7 and Fluent Forms both offer file upload on their free tiers. The fields are functional. You can set allowed file types and basic size limits.
What costs money: Drag-and-drop upload zones, chunk uploading, upload progress bars, cloud storage routing (Amazon S3, Google Drive, Dropbox), and multi-file fields with previews. These features live behind paid plans across almost every plugin.
For a basic “attach your resume” field on a contact us page, free options work. For anything more complex (client portals, support ticket systems, intake forms collecting multiple documents), budget for a premium license.
How to Add a File Upload Field to a WordPress Form
The setup process depends entirely on your plugin. But the overall pattern is the same: install the plugin, create a form, add the file upload field, configure its settings, embed the form on a page.
I’ll walk through WPForms first since it’s the most popular drag-and-drop builder, then cover Contact Form 7 for people who prefer the free route.
Adding a File Upload with WPForms
Step 1: Install and activate WPForms. If you need file upload, you’ll need at least the Basic paid plan.
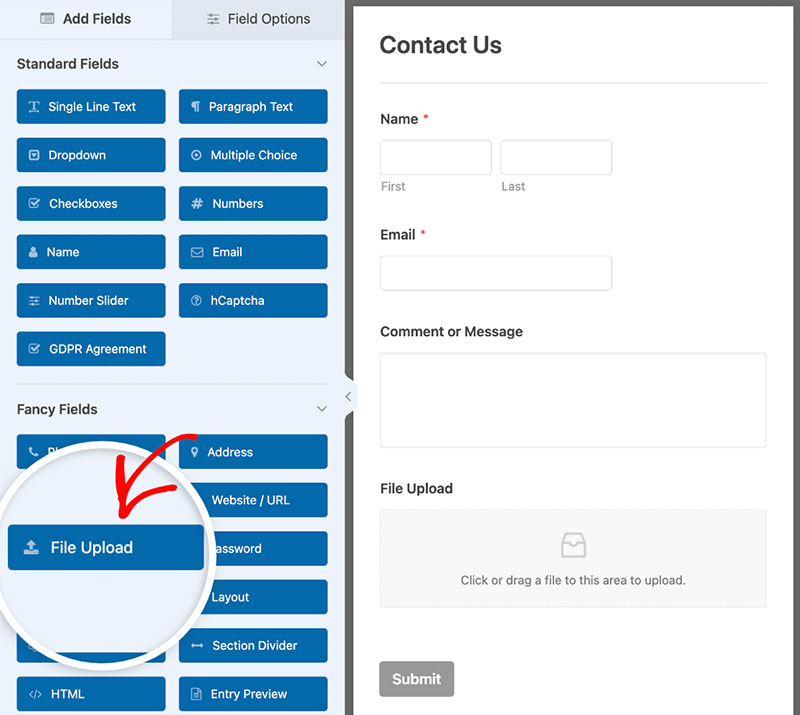
Step 2: Create a new form or edit an existing one. In the form builder, look for the “File Upload” field in the “Fancy Fields” section. Drag it onto your form.
Step 3: Click the file upload field to open its settings. Here you can set allowed file extensions (like .pdf, .jpg, .png, .docx), maximum file size, and whether to allow multiple files per field.
Step 4: Configure your notification email. Decide whether uploaded files should be attached directly to the email or sent as download links.
Step 5: Embed the form on a page using the WPForms block in the Gutenberg editor, or paste the shortcode into any post or page.
The whole process takes about five minutes if you already know what fields you need. For tips on structuring your forms to get better completion rates, check out these form optimization tips.
Setting Up File Upload with Contact Form 7
CF7 uses a tag-based syntax. To add a file upload field, you insert a tag like this into your form template:
[file your-file limit:5mb filetypes:pdf|doc|docx]
The limit parameter sets the max file size. The filetypes parameter restricts which extensions are accepted.
To attach the uploaded file to your notification email, add [your-file] to the “File Attachments” field in the Mail tab. Without this step, the file gets uploaded to the server but never reaches your inbox.
Known quirk: CF7 doesn’t show a clear error message when uploads fail due to server-side file size limits. The form just fails silently. This trips up a lot of people. If your WordPress email settings are misconfigured, attachments may not arrive at all.
File Type Restrictions and Security for Upload Forms
Accepting file uploads on your WordPress site opens a direct path from the outside world to your server. Without proper restrictions, that path becomes a vulnerability.
Wordfence’s vulnerability analysis found that file upload vulnerabilities are the third most common type among WordPress security flaws. The OWASP Top 10 lists unrestricted file uploads as a significant risk category.
Why Unrestricted Uploads Are Dangerous
An attacker uploads a PHP file disguised as an image. If the server executes it, they have remote code execution. Full server access. Database exfiltration. Backdoor installation.
This isn’t theoretical. The WordPress File Manager plugin (700,000+ active installations) had a critical remote code execution vulnerability with a CVSS score of 9.9 that allowed exactly this type of attack.
In 2024, 43% of all WordPress vulnerabilities could be exploited without authentication, according to Patchstack. That means no login required. An anonymous visitor with a malicious file is all it takes.
WordPress Default MIME Type Restrictions
WordPress maintains an internal list of allowed MIME types. By default, it permits common file types like images (.jpg, .png, .gif), documents (.pdf, .doc, .docx), and a handful of others.
You can modify this list using the uploadmimes filter in your theme’s functions.php or a custom plugin. Add types you need. Remove types you don’t.
Always block executable file types: .php, .exe, .sh, .js, .phtml, .php5, .asp, .aspx. If you’re running an Apache server, add .htaccess rules to the uploads directory that prevent PHP execution entirely.
Defense-in-Depth Approach
No single check is enough. Combine these layers:
- Extension validation: Whitelist allowed file extensions at the plugin level
- MIME type checking: Validate the Content-Type header and the file’s magic bytes
- File name sanitization: Strip special characters and path traversal sequences like
../ - Storage isolation: Keep uploaded files outside the webroot when possible, or in a directory with no-execute permissions
Security plugins like Wordfence and Sucuri can scan uploaded files for malicious content. If your site collects sensitive documents (medical records, financial files, ID scans), consider how you’re handling GDPR compliant forms and data privacy obligations too.
For a deeper look at protecting form inputs on the server side, read about how to sanitize user input in your forms and the best tactics for form spam prevention.
File Size Limits and Server Configuration
This is the single most common problem people hit with WordPress file upload forms. The form looks fine. The user picks a file. They click submit. And… nothing happens. Or they get a cryptic error about the file being too large.
The culprit is almost always a PHP server configuration limit that’s lower than the file size your visitors are trying to upload.
Where File Size Gets Limited
Three separate places control the maximum upload size, and the lowest value wins:
| Setting | Controls | Default Value |
|---|---|---|
| upload_max_filesize | Max size of a single uploaded file | 2 MB (PHP default) |
| post_max_size | Max size of the entire POST request body | 8 MB (PHP default) |
| Plugin setting | Limit set within the form plugin itself | Varies by plugin |
PHP’s default uploadmaxfilesize is just 2 MB. Many shared hosting providers bump this up, but the number varies wildly. Kinsta sets it at 128 MB. Bluehost defaults to 50 MB. Some budget hosts leave it at the PHP default of 2 MB.
How to Check Your Current Limits
Two quick options. Go to WordPress Dashboard > Media > Add New and look at the “Maximum upload file size” text below the upload area. Or use the Site Health screen (Tools > Site Health > Info > Server) which shows your current PHP configuration values.
For exact numbers, create a temporary PHP file with <?php phpinfo(); ?> and load it in your browser. Search for uploadmaxfilesize and postmaxsize. Delete the file when you’re done.
How to Increase the Limits
Via php.ini (if your host allows it):
uploadmaxfilesize = 64M postmaxsize = 64M memorylimit = 256M
Via .htaccess (Apache servers):
phpvalue uploadmaxfilesize 64M phpvalue postmaxsize 64M
Via wp-config.php:
@iniset('uploadmaxsize', '64M');
On managed hosting platforms like WP Engine, Kinsta, or SiteGround, you typically can’t edit php.ini directly. Contact their support team instead. This is a common request and usually gets resolved in a few minutes.
When Uploads Fail Silently
Some form plugins don’t surface PHP errors gracefully. When a file exceeds the server limit, the form just… stops. No error message. No feedback. The visitor has no idea what happened.
An HTTP 413 error (“Request Entity Too Large”) means the web server (Nginx or Apache) rejected the request before PHP even saw it. For Nginx, you’ll need to increase the clientmaxbodysize directive in the server config.
Good form error messages make a huge difference here. Configure your form plugin to display clear feedback when uploads fail, including the maximum allowed file size. Otherwise you’re just watching form abandonment rates climb for no reason.
Storing Uploaded Files Outside the Media Library
Every file uploaded through a WordPress form ends up somewhere on your server. By default, that’s the wp-content/uploads directory, and many plugins dump form submissions straight into the WordPress media library.
This creates a mess fast. Client resumes mixed in with your blog images. Signed contracts sitting next to logo files. The media library was built for content assets, not form submissions.
Plugin-Level Storage Separation
WPForms stores submitted files in its own wpforms subdirectory inside uploads by default. This keeps form attachments out of your media library entirely.
Gravity Forms does something similar, placing entries in a dedicated folder structure. Formidable Forms gives you control over the upload path per form.
If your plugin doesn’t separate files automatically, you’re stuck managing form submissions alongside every featured image and infographic you’ve ever uploaded. That’s a form design problem worth solving early.
Cloud Storage Routing
Amazon S3 is the most common offloading destination. Plugins like WP Offload Media copy files to S3 buckets automatically, removing them from your local server.
Other options include Google Drive and Dropbox, typically connected through Zapier or native plugin integrations. The file gets uploaded to your server first, then transferred to the cloud, then (optionally) deleted from local storage.
| Storage Method | Best For | Downside |
|---|---|---|
| Local (default) | Simple setups, low volume | Uses server disk space |
| Amazon S3 | High volume, scalable storage | AWS configuration complexity |
| Google Drive | Teams using Google Workspace | Often requires Zapier or integrations |
| Dropbox | Client-facing file sharing | Limited automation options |
Privacy and Auto-Deletion
Sensitive documents need special handling. If your forms collect ID scans, medical records, or financial files, storing them indefinitely on a shared server is a liability.
Some plugins support auto-deleting uploaded files after a set number of days. You can also configure server-side cron jobs to purge old submissions. For sites handling EU user data, pair this with GDPR consent form practices to stay compliant.
Multi-File and Drag-and-Drop Upload in WordPress Forms
The default browser file picker looks and feels outdated. Users expect something better, especially on sites that handle document-heavy workflows.
Enabling Multi-File Uploads
Most premium form plugins let you set a maximum file count per field. WPForms Pro, Gravity Forms, and Formidable Forms all support this natively.
Set the limit based on your actual needs. A job application might accept 3 files (resume, cover letter, portfolio). A support ticket might only need 1 screenshot. A client onboarding web form could require 5 or more documents.
Bit Form research suggests that reducing unnecessary form fields can boost completion rates by up to 120%. Only show multi-file upload fields when the user actually needs them.
Drag-and-Drop Upload Zones
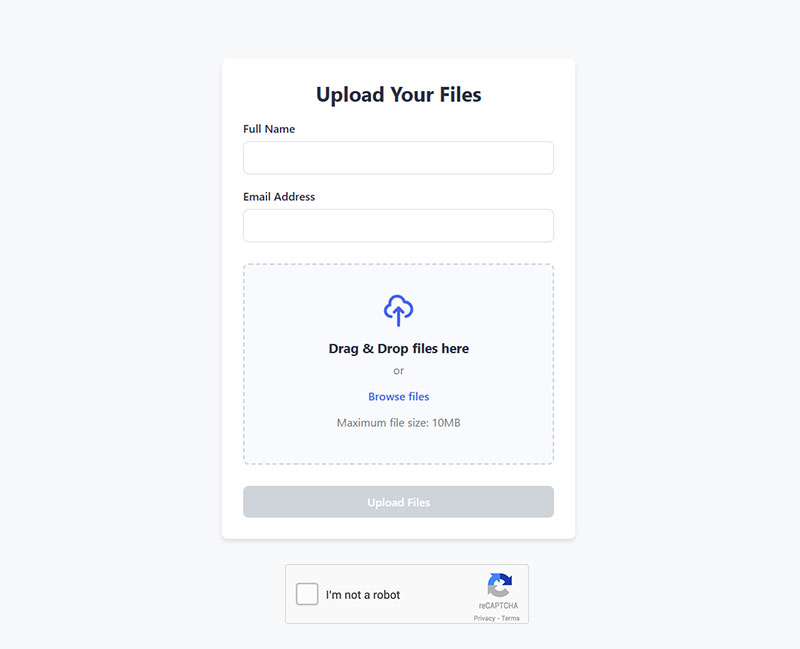
Drag-and-drop upload replaces the basic “Choose File” button with a visual drop zone. Users can drag files directly from their desktop onto the form.
Plugins that support it: WPForms Pro, Gravity Forms, Formidable Forms (Pro), Fluent Forms (Pro).
Plugins that don’t: Contact Form 7 (without third-party add-ons).
The drag-and-drop interface usually includes an upload progress bar and file preview thumbnails. These visual cues reduce uncertainty. People want to know their file is actually uploading, especially with larger documents.
Mobile Upload Considerations
On iOS and Android, the “drag and drop” interaction doesn’t translate. Mobile browsers open the device’s native file picker instead, which includes options for camera capture, photo library access, and the device’s file manager.
Test your upload forms on actual phones. Some plugins render poorly on small screens, with upload buttons getting cut off or progress bars overlapping other fields. Good mobile form practices matter here as much as anywhere else on your site.
Sending Uploaded Files in Email Notifications

Getting the file from the visitor’s browser to your server is only half the job. You also need to receive it, either as an email attachment or a download link in your notification.
Attachments vs. Download Links
There are two approaches, and the right one depends on your file sizes.
Direct email attachments: The uploaded file gets packaged into the notification email. Simple. Immediate. But Gmail, Outlook, and most SMTP services cap attachments at 25 MB. Base64 encoding adds roughly 37% to the file size during transmission, so a 20 MB file can actually exceed a 25 MB limit after encoding.
Download links: The notification email contains a URL pointing to the file on your server (or cloud storage). No size limit issues. The trade-off is that links expire if you delete the files or change your storage setup.
For most use cases, download links are the safer option. Reserve direct attachments for small files only (under 10 MB).
SMTP Plugin Configuration
WordPress uses the PHP mail() function by default, which is unreliable for attachments. Emails get flagged as spam, or they don’t arrive at all.
WP Mail SMTP and Post SMTP both fix this by routing your emails through a proper SMTP server (Gmail, SendGrid, Mailgun, Amazon SES). This alone solves most “I never received the form submission” complaints.
Wordfence reported that WordPress site owners blocked 55 billion password attack attempts in 2024. Security plugins like these are already running on most well-maintained sites, so adding an SMTP plugin to the stack is a small step that pays off immediately in email deliverability.
Viewing Submissions in the Dashboard
Not all plugins store form entries in the WordPress admin. Contact Form 7, for instance, doesn’t save submissions by default. You need the Flamingo add-on for that.
WPForms, Gravity Forms, Formidable Forms, and Fluent Forms all store entries with file links in the dashboard. You can view, download, and export submitted files without ever opening your email.
For teams that process high volumes of submissions (staffing agencies, law firms, property management companies), dashboard-based entry management is worth the premium license cost by itself.
Conditional File Uploads Based on User Input
Not every form submission needs a file attachment. Showing an upload field to users who don’t need it adds friction, increases load time, and makes the form look longer than it actually is.
Conditional logic fixes this. The file upload field only appears when a specific condition is met.
How Conditional File Uploads Work
Crocoblock research indicates conditional forms boost conversion rates by 15-25% by removing irrelevant fields from the user’s view.
The logic is simple: If the user selects “Job Application” from a dropdown, the resume upload field appears. If they select “General Inquiry,” it stays hidden.
WPForms, Gravity Forms, and Formidable Forms all support show/hide rules on file upload fields. Fluent Forms includes conditional logic even on its free tier, though the file upload field itself may require Pro.
Use Cases for Conditional Uploads
- Show “Upload your resume” only when “Job Application” is selected as the inquiry type
- Display a screenshot upload on support forms only when the user reports a visual bug
- Request proof of payment only when the form is for event registration, not general contact
Studies from Bit Form show that cutting form fields from 11 to 4 increases form completion rates by 120%. Conditional file uploads directly contribute to this, hiding complexity until it’s genuinely needed.
For a deeper look at how conditional rules work across different plugins, see this guide on form builders with conditional logic.
Performance Benefit
There’s a technical advantage too. File upload fields load JavaScript libraries for drag-and-drop interactions, progress bars, and file previews. When the field is hidden via conditional logic, those scripts don’t load until the field is triggered.
Fewer scripts on initial page load means faster rendering. That matters for increasing form conversions, especially on mobile connections where every kilobyte counts.
Troubleshooting WordPress File Upload Form Errors
File uploads break in ways that text inputs simply don’t. Server configs, plugin conflicts, permissions issues, and MIME type mismatches all contribute to failures that are sometimes hard to diagnose.
Here are the most common problems and their fixes.
“Upload Failed” with No Error Message
Cause: The uploaded file exceeds the server’s uploadmaxfilesize or postmaxsize limit. PHP rejects the request before your form plugin even sees it, so the plugin has nothing to report.
Fix: Check your PHP limits via the Site Health screen (Tools > Site Health > Info > Server). Increase uploadmaxfilesize and postmaxsize in your php.ini, .htaccess, or through your hosting control panel.
HTTP 413: Request Entity Too Large
This error comes from the web server, not PHP. If you’re running Nginx, the clientmaxbodysize directive defaults to 1 MB on many configurations.
Add clientmaxbodysize 64M; to your Nginx server block and restart the service. Apache users hitting this error should check LimitRequestBody in their server config.
Files Not Arriving in Notification Emails
Three likely causes:
- The form plugin isn’t configured to attach files to the notification (check the mail template settings)
- The SMTP connection drops large attachments silently
- WordPress is using PHP
mail()instead of a proper SMTP plugin, and the email lands in spam or gets blocked entirely
Switch to WP Mail SMTP or Post SMTP and test with a small file first. If that works but larger files don’t, switch to download links instead of direct attachments.
MIME Type Mismatch Errors
WordPress checks the uploaded file’s MIME type against its internal whitelist. Sometimes valid files get rejected because the server reads the MIME type differently than expected.
The uploadmimes filter in functions.php lets you add custom MIME types. But be careful about what you whitelist, since 96% of WordPress vulnerabilities in 2024 were found in plugins and themes, according to Patchstack. Expanding your allowed file types without proper server-side validation is an open invitation.
Plugin Conflicts with Security Tools
Security plugins like Wordfence, Sucuri, and iThemes Security sometimes block file uploads they consider suspicious. This happens most often with zip files, SVG files, and anything the plugin’s scanner flags as potentially executable.
Check your security plugin’s firewall logs first. If the upload is legitimate, add a rule exception for the specific form page or file type. Don’t disable the entire firewall just to make uploads work.
Permission Issues on the Uploads Directory
The wp-content/uploads directory needs the correct file permissions for WordPress to write files to it. The standard recommendation is 755 for directories and 644 for files.
If permissions are set to 777, uploads will work but your server is wide open. If they’re too restrictive (like 700 on a shared host), uploads will fail silently. Use your hosting control panel’s file manager or an FTP client to check and adjust.
For a complete reference on form validation best practices (including both client-side and server-side validation), those guides cover the full picture beyond just file uploads.
FAQ on WordPress Form With File Upload
What is the maximum file upload size in WordPress?
It depends on your hosting provider and PHP configuration. The PHP default for uploadmaxfilesize is 2 MB, but most hosts set it between 32 MB and 128 MB. You can change it via php.ini, .htaccess, or your hosting control panel.
Which WordPress plugin is best for file upload forms?
WPForms and Gravity Forms are the most popular choices for drag-and-drop file uploads. Contact Form 7 works if you want a free option, though it lacks a visual builder. Your choice depends on budget and how much customization you need.
Can I accept file uploads with a free WordPress form plugin?
Yes. Contact Form 7 and Fluent Forms both support file uploads on their free tiers. The upload fields are basic (no drag-and-drop or progress bars), but they handle standard file attachments for simple use cases like job applications or support requests.
How do I restrict which file types users can upload?
Most form plugins let you specify allowed extensions (like .pdf, .jpg, .docx) in the file upload field settings. WordPress also checks MIME types server-side. For tighter control, use the uploadmimes filter in your theme’s functions.php file.
Why are uploaded files not arriving in my email notifications?
WordPress uses PHP mail() by default, which is unreliable for attachments. Install an SMTP plugin like WP Mail SMTP or Post SMTP to route emails through a proper mail server. Also check that your form plugin is configured to attach files to notifications.
Is it safe to accept file uploads on a WordPress form?
It can be, with the right precautions. Block executable file types (.php, .exe, .js), validate MIME types server-side, and set .htaccess rules to prevent code execution in your uploads directory. Security plugins like Wordfence add another layer of scanning.
How do I increase the file upload size limit in WordPress?
Edit uploadmaxfilesize and postmaxsize in your php.ini or .htaccess file. On managed hosts like Kinsta or WP Engine, contact support to request an increase. Always set postmaxsize slightly higher than your upload limit.
Can I store uploaded files in cloud storage instead of my server?
Yes. Plugins like WP Offload Media route files to Amazon S3, Google Cloud, or DigitalOcean Spaces. You can also use Zapier integrations to send uploaded files to Google Drive or Dropbox automatically after form submission.
How do I add conditional logic to a file upload field?
WPForms, Gravity Forms, and Formidable Forms all support show/hide rules on file upload fields. Set a condition (like a dropdown selection or checkbox value) and the upload field only appears when that condition is met.
What causes the HTTP 413 error when uploading files?
The web server is rejecting the request before PHP processes it. On Nginx, increase the clientmaxbodysize directive. On Apache, check the LimitRequestBody setting. This is separate from PHP’s own uploadmaxfilesize limit.
Conclusion
Setting up a WordPress form with file upload is straightforward once you understand the moving parts. The plugin handles the frontend. PHP and your server configuration handle the backend. Security practices hold the whole thing together.
Pick a form builder that matches your technical comfort level. WPForms and Gravity Forms cover most needs. Contact Form 7 works fine if you’re comfortable with markup and don’t mind the lack of a visual editor.
Don’t skip the server-side work. Adjust your uploadmaxfilesize and postmaxsize values before your first user hits a silent failure. Set up an SMTP plugin so notification emails actually arrive.
Lock down your allowed file types. Use conditional logic to keep forms short. Route sensitive documents to cloud storage when local server storage isn’t appropriate.
Test everything on mobile before going live. The upload experience on a phone is different from desktop, and that’s where most of your visitors probably are.

