Table of contents
IvyForms integrates directly with Elementor, letting you drop forms onto your pages with a dedicated widget instead of pasting shortcodes. This article explains how to add an IvyForms form using the Elementor widget and how to configure the options it offers.
While editing a page in Elementor, open the Elements panel and look under the Widgets tab, where the IvyForms widget is listed. The quickest way to find it is to type Ivy into the widget search field, which filters the list down to the IvyForms widget.
Drag the IvyForms widget from the Elements panel onto your page. In the Edit IvyForms panel that opens, go to the Content tab and open the Select Form dropdown under Form Settings, then choose one of your existing forms. As soon as you select it, the form is rendered as a live preview in the editor.
Once a form is selected, the widget shows a preview of it directly on the Elementor canvas, reflecting the form’s structure and styling so you can see how it will look on the front end. The preview is for visual confirmation only and does not submit real data while you are editing the page.
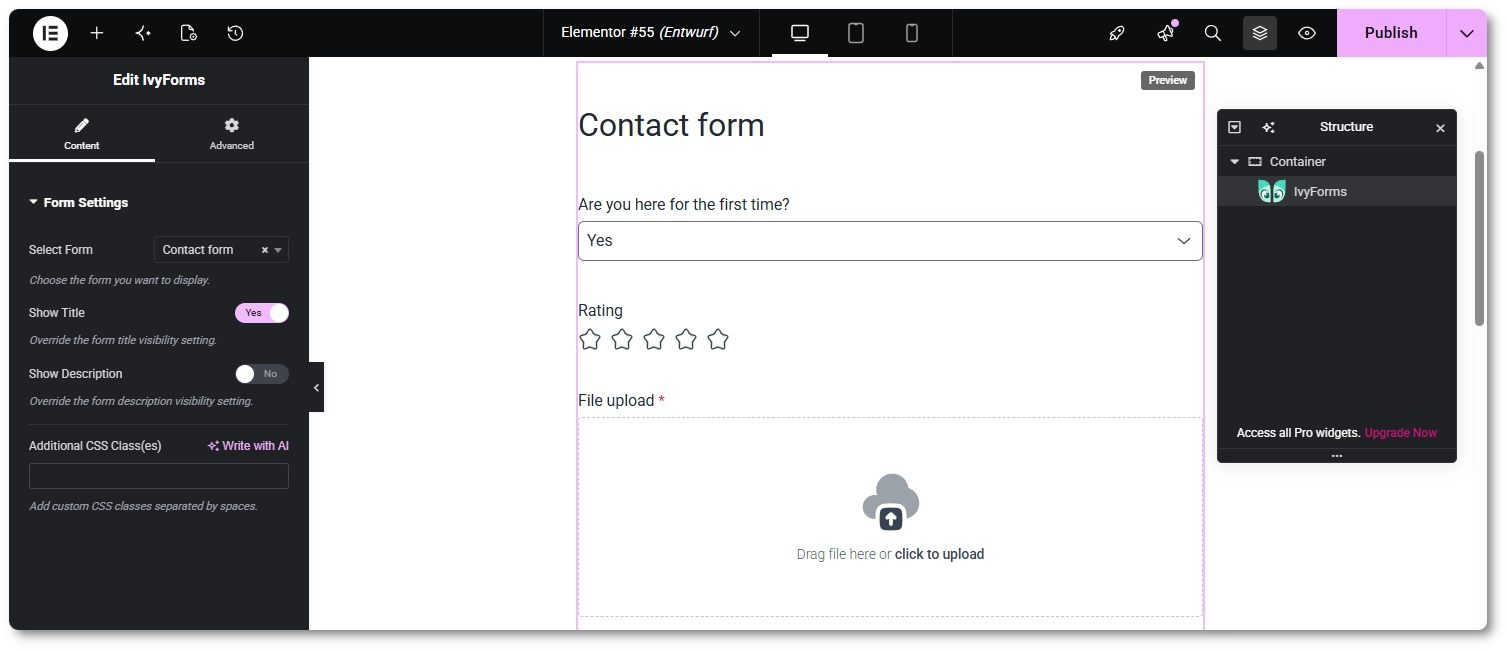
With the IvyForms widget selected, the Content tab provides the options that control how the form appears on the page.
These settings affect only the form’s appearance on the page where it is embedded and do not change the form’s configuration in the builder. The widget’s Advanced tab holds Elementor’s own standard layout and styling controls, which apply to the widget like any other Elementor element.
Once the form is added and configured, publish or update the page as usual. After publishing, the widget renders the selected form on the front end of your site, where visitors can fill it in and submit entries, seeing the form exactly as configured in the builder and the widget settings.