Limited time discount
First Birthday, Big Savings
Up to 80%Off
Up to 80%Off
Grab Now
documentation-logo
Menu
  • Guides
  • Form Management
  • Payment fields

How does the total field work in IvyForms

Your form lets customers pick a USB-C cable length and choose how many they want, and now you need to show them what they owe. The Total field does that: it adds up every product and quantity on the form and displays the amount due, updating on its own as selections change. It is the last of the three payment fields in IvyForms, following the Product and Quantity fields, and it is free to use. This article covers where to find the field, how it calculates the amount, the settings behind it, and where the total shows up after submission.

Where can I find the total field in IvyForms?

You can add the Total field from the Payment fields section in the left panel of the IvyForms builder. Expand Add field → Payment, select Total, and it is added to your form, ready to configure in the options panel. Add it after your Product and Quantity fields, since it works from the values they produce.

Payment fields section in the IvyForms builder showing the Total field

How does the total field calculate the amount?

The Total field adds up each product on the form multiplied by its mapped quantity, with no setup needed beyond having those fields in place. Carrying the cable example through: if a customer selects the 5 m cable at $29.99 and sets the quantity to 3, the field shows $89.97, and if the form has more than one product, every line is summed into a single amount. For how items and prices are defined, see the Product field documentation, and for how quantities are mapped to a product, see the Quantity field documentation.

What settings can I configure for the total field?

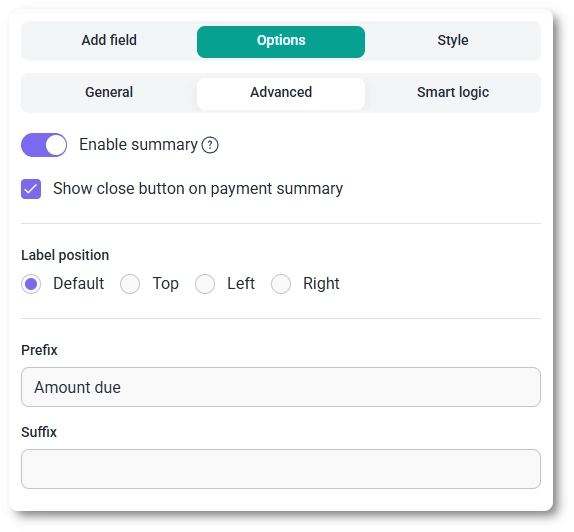
After selecting the Total field in the preview, the side panel switches to the Options view, split across the General, Advanced, and Smart logic tabs. These control the labeling and messaging, the summary breakdown and surrounding text, and when the field appears.

How do general settings work for the total field?

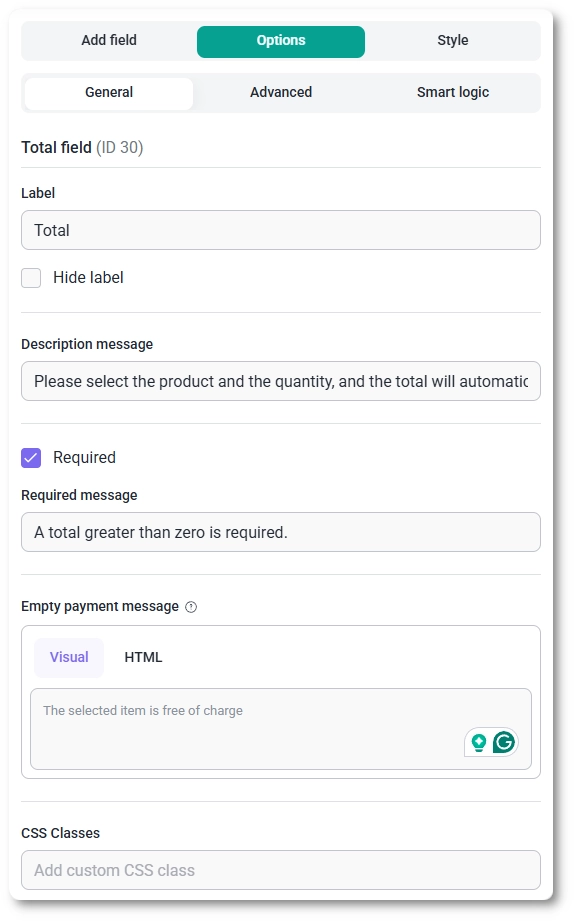
The General tab shows the field type (Total) and its field ID, along with the options that control how the amount is labeled and what shows when there is nothing to pay.

  • Label – the name shown above the amount.
  • Hide label – removes the label on the front end.
  • Description message – a short note under the field to explain how the total is worked out.
  • Required – requires a payable total, so the form cannot be submitted while the amount is zero.
  • Required message – the text shown when the total is still zero on submission; it appears once Required is enabled.
  • Empty payment message – the content shown when the selection has no payable amount (for example, a free item), written in a Visual or HTML editor.
  • CSS classes – custom class names for styling the field.
General settings tab for the Total field in IvyForms

The Advanced tab controls the breakdown summary and the text around the amount.

  • Enable summary – shows a line-item breakdown above the final amount, listing each selected product with its price so customers see how the total adds up rather than just the figure.
  • Show close button on payment summary – adds a close button to that summary so customers can dismiss the breakdown.
  • Label position – places the label in the Default position or to the Top, Left, or Right.
  • Prefix – text set to show before the amount, such as “Amount due”; it does not appear while Enable summary is on.
  • Suffix – text set to show after the amount, and like the prefix it is hidden while Enable summary is on.
Advanced settings tab for the Total field showing summary and prefix options

How can I use smart logic with the total field?

Smart logic is a Pro feature. It lets you show or hide the Total field based on what customers enter in other fields: set Conditional Logic to Yes, choose whether Any or All rules must match, then build rules from a source field, an operator (equals, does not equal, contains, or does not contain), and a value.

How does the total field look on the front end?

On the front end the field recalculates automatically as the customer changes products or quantities. With Enable summary on, it shows a small table listing each selected product with its price and the combined total beneath, and a close button in the corner lets customers dismiss it when you have enabled that option. Your Description message sits below the field, and when a selection carries no payable amount, the Empty payment message shows in place of a figure.

Total field on the front end showing a payment summary and the amount due

Where does the total appear after submission?

After a form is submitted, the calculated total appears in both the single entry view and the all-entries table, and the value is included in email notifications and webhook payloads when those are enabled. This is the figure the customer agreed to pay, drawn from the products selected and the quantities entered, so it gives you the final amount for each entry at a glance.

What should I keep in mind when using the total field?

Turn on Required so a form cannot be submitted with a zero total when a payment is expected, and use Enable summary when you want customers to see exactly how the amount breaks down before they commit. Set a clear Prefix such as “Amount due”, and write an Empty payment message for the cases where a selection carries no charge. To customize colors, spacing, typography, buttons, and the overall form appearance, see the Style tab documentation.