Limited time discount
First Birthday, Big Savings
Up to 80%Off
Up to 80%Off
Grab Now
documentation-logo
Menu
  • Guides
  • Form Management
  • Payment fields

How does the quantity field work in IvyForms

You have a USB-C charging cable on your form with three length options, and now you want customers to say how many they need. The Quantity field handles that: it captures a number and ties it to a specific product so the price can be multiplied out. It is the second of the three payment fields in IvyForms, sitting between the Product field that defines what is for sale and the Total field that adds everything up, and it is free to use. This article covers where to find the field, how it maps to a product, the settings behind it, and where the values land after submission.

Where can I find the quantity field in IvyForms?

You can add the Quantity field from the Payment fields section in the left panel of the IvyForms builder. Expand Add field → Payment, select Quantity, and it is added to your form, ready to configure in the options panel. Add it after the Product field it will be tied to, since you map the two together in the next step.

Payment fields section in the IvyForms builder showing the Quantity field

How does the quantity field connect to a product?

The Quantity field connects to a product through the Product mapping setting in its General tab, where you choose which product field this quantity counts. Only products created in the same form appear in the list, so a quantity field cannot pull products from another form. Once mapped, the quantity multiplies the price of the selected product: if a customer picks the 5 m cable at $29.99 and sets the quantity to 3, that line comes to $89.97, which the Total field then adds up. For how the items and prices are defined in the first place, see the Product field documentation.

Product mapping setting on the Quantity field in IvyForms

What settings can I configure for the quantity field?

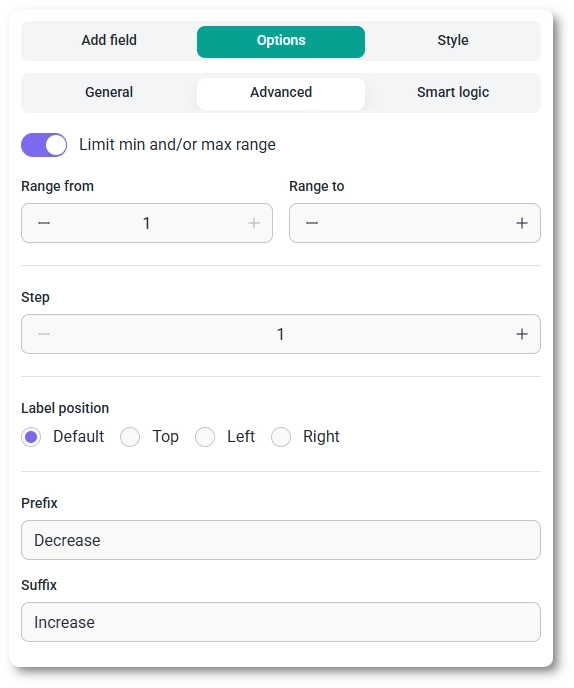
After selecting the Quantity field in the preview, the side panel switches to the Options view, split across the General, Advanced, and Smart logic tabs. These control how the field is labeled and mapped, the range and step of the numbers it accepts, and when it appears.

How do general settings work for the quantity field?

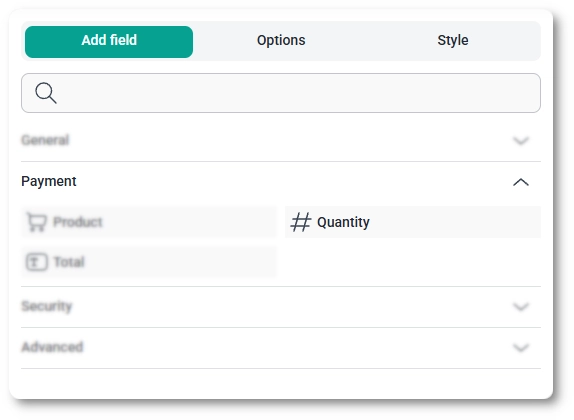
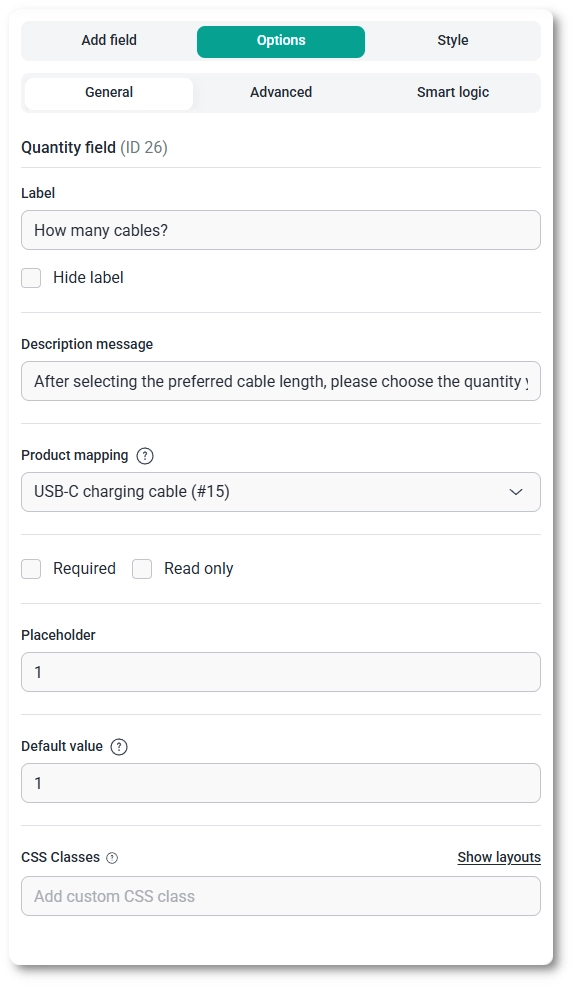
The General tab shows the field type (Quantity) and its field ID, along with the core options that control labeling, mapping, and input.

  • Label – the name shown above the field.
  • Hide label – removes the label on the front end.
  • Description message – a short note under the field to guide the customer.
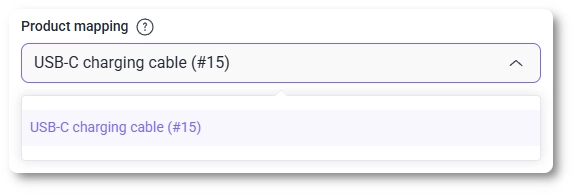
  • Product mapping – selects which product field in the form this quantity counts; only products from the same form are listed.
  • Required – makes a value mandatory before the form can be submitted.
  • Required message – the text shown when someone submits without a value; it appears once Required is enabled.
  • Read only – shows the field in a non-interactive state, and it is unavailable while Required is on.
  • Placeholder – example text shown in the field before a number is entered.
  • Default value – a number placed in the field automatically, which the customer can change.
  • CSS classes – custom class names for styling the field.
General settings tab for the Quantity field in IvyForms

How do advanced settings work for the quantity field?

The Advanced tab controls the allowed numbers, the increment, and the layout around the field.

  • Limit min and/or max range – a toggle that, when on, reveals Range from and Range to so you can set the lowest and highest quantity allowed; leave Range to empty for no upper limit.
  • Step – the amount each increment adds or removes; set it below 1 (for example, 0.5) to allow partial quantities, which is useful when the quantity stands for something like billable hours.
  • Label position – places the label in the Default position or to the Top, Left, or Right.
  • Prefix – text shown immediately before the input box.
  • Suffix – text shown immediately after the input box.
Advanced settings tab for the Quantity field showing range, step, prefix, and suffix

How can I use smart logic with the quantity field?

Smart logic is a Pro feature. It lets you show or hide the Quantity field based on what customers enter in other fields: set Conditional Logic to Yes, choose whether Any or All rules must match, then build rules from a source field, an operator (equals, does not equal, contains, or does not contain), and a value. For example, you can reveal the quantity only after a product has been selected.

How does the quantity field look on the front end?

On the front end the field shows a number box with minus and plus steppers, framed by any Prefix and Suffix text you set, with the description message below it. Customers can type a number or use the steppers, which move in whatever Step you configured and stay within the range you allowed.

Quantity field on the front end with stepper, prefix, suffix, and description

Where do quantities appear after submission?

After a form is submitted, the quantity appears in both the single entry view and the all-entries table, and the value is included in email notifications and webhook payloads when those are enabled. The same value feeds the Total field, which multiplies it by the mapped product’s price to produce the amount the customer pays.

What should I keep in mind when using the quantity field?

Always set Product mapping so the quantity has a price to multiply; without it, the number has nothing to calculate against. Use Range from and Range to to keep orders sensible, and reach for a fractional Step only when partial amounts genuinely make sense. A short Suffix naming the unit (such as the item being counted) reads more clearly than leaving the box bare. To customize colors, spacing, typography, buttons, and the overall form appearance, see the Style tab documentation.