

Spam bots submitted over 99 billion junk form entries across the web in 2024. Your site caught some of that traffic, guaranteed. The best tactics for form spam prevention combine…
Table of Contents
Users expect to grab a file off their desktop and drop it straight into your browser. The standard file input button feels dated by comparison.
Learning how to make a drag and drop file upload form gives you a faster, more intuitive upload experience using the HTML Drag and Drop API, the File API, and FormData. No plugins required.
This guide walks through building a complete upload form from scratch with HTML, CSS, and JavaScript. You’ll cover the drop zone markup, drag event handling, client-side file validation, server uploads with progress tracking, and the common bugs that catch most developers off guard. Plus library options like Dropzone.js and React Dropzone if you’d rather skip the manual work.
Security and accessibility get their own sections too, because a file upload that’s easy to use but easy to exploit isn’t worth shipping.
What Is a Drag and Drop File Upload Form?
A drag and drop file upload form is an HTML form element that lets users select files from their operating system and drop them directly into a designated area inside the browser. Instead of clicking a button and browsing through folders, users grab files off their desktop and release them onto a drop zone.
That’s the whole idea. And it works because people already understand the gesture from using their computers every day.
The standard <input type="file"> element has been around forever. It opens a system dialog, the user picks a file, done. But it feels clunky. There’s no visual feedback, no preview, no sense that anything happened until the form submits.
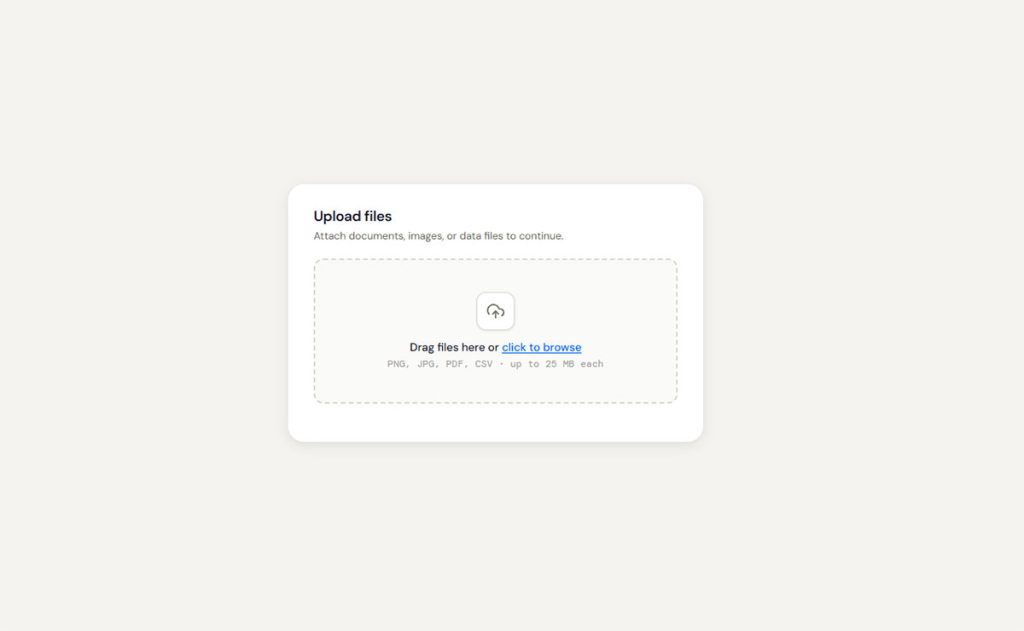
A drag and drop interface fixes that. You get a visible drop zone area, usually styled with a dashed border and a prompt like “Drop files here.” Users see instant confirmation when files land. Thumbnails appear. File names and sizes show up. The whole thing feels faster even when upload speeds are the same.
Google Drive, Dropbox, WordPress, Slack, and Trello all use this pattern. If you’ve attached a file in Gmail, you’ve used it.
Under the hood, three browser APIs make it possible: the HTML Drag and Drop API for detecting drag events, the File API for reading file data on the client side, and FormData for packaging files into an HTTP request. These are all native to modern browsers. No plugins, no Flash, no third-party dependencies needed for a basic implementation.
According to Zuko Analytics, the overall completion rate for web forms drops below 50% once you account for visitors who see the form but never interact. A smooth file upload experience can be the difference between a completed submission and an abandoned one. WPForms data shows that 67% of visitors abandon a form permanently if they run into any complications.
So yes, this is a UX problem as much as a technical one.
How the HTML Drag and Drop API Works for File Uploads
The HTML Drag and Drop API is the browser-level system that powers every drag interaction you see on the web. It was originally modeled after Internet Explorer’s early implementation and later formalized as part of the HTML5 spec by the W3C.
For file uploads specifically, you only need to care about four JavaScript events.
Event Sequence During a File Drop
When a user drags a file from their desktop over a drop zone element, the browser fires events in a specific order:
Here’s the part that trips up most developers. If you don’t call preventDefault() on both the dragover and drop events, the browser will do its default thing: open the file directly in the tab. Your carefully built upload form disappears, replaced by a raw image or a PDF viewer.
Took me way too long to figure that out the first time. The MDN Web Docs mention it, but it’s easy to miss when you’re scanning quickly.
Accessing Files from the DataTransfer Object
Once the drop event fires, you pull files from event.dataTransfer.files. This gives you a FileList, which looks like an array but technically isn’t one (you’ll need to convert it with Array.from() or the spread operator if you want to use array methods on it).
Each file in that list is a File object containing properties like name, size, type (the MIME type), and lastModified. That’s everything you need for client-side validation before the upload even starts.
One thing to watch: there’s a difference between dragging files from the OS and dragging DOM elements within the page. OS file drags populate dataTransfer.files. Internal DOM drags use dataTransfer.setData() and getData(). Mixing them up leads to empty file lists and confused debugging sessions.
LambdaTest reports a cross-browser compatibility score of 83 out of 100 for the Drag and Drop API. Chrome, Firefox, Safari, and Edge all support the core drag events on desktop. Mobile is a different story entirely, since touch events and drag events are separate systems. Your mileage may vary on iOS Safari especially.
Building the Drop Zone with HTML and CSS
See the Pen
Drag & Drop File Upload Form by Bogdan Sandu (@bogdansandu)
on CodePen.
The drop zone is the visible target where users release their files. Building one that works well means thinking about markup, styling, and fallback behavior at the same time.
Styling the Drag-Over State
Start with a container div. Inside it, place a label or prompt text and a hidden file input. The HTML is minimal:
- A wrapper
<div>with a class like.drop-zone - A
<p>or<span>with instructional text (“Drag files here or click to browse”) - An
<input type="file">element, visually hidden but still accessible
The default state should be clean. A dashed or dotted border signals “droppable” to users, which is a convention set by apps like Dropbox and Google Drive. The Nielsen Norman Group notes that dashed borders are the most recognized visual pattern for drop zones.
When a file hovers over the zone (the dragenter event), swap in an active state. Change the background color, darken the border, maybe scale the icon slightly. This CSS-driven visual feedback tells users “yes, you can let go here.”
Keep the drop zone large enough to be a comfortable target. A small box tucked in a corner is frustrating to aim at. Good form design means making the drop area prominent, ideally spanning the full width of the form.
Keeping the Hidden File Input as Fallback
Never remove the file input element. It’s your fallback for browsers that don’t support drag events, for mobile users on touch devices, and for people using keyboard navigation or screen readers.
Hide it with CSS (opacity: 0 and position: absolute works well), then wire the drop zone’s click event to trigger the input’s click. That way, users who prefer the traditional “click to browse” method still have a clear path.
Responsive behavior matters too. On smaller screens, the drop zone should stack vertically and the text should adjust. A prompt like “Tap to select files” makes more sense on mobile than “Drag and drop.” Solid mobile forms adapt their language and layout to the device.
Handling File Drops with JavaScript
See the Pen
Drag & Drop File Upload – Part 2: Validation by Bogdan Sandu (@bogdansandu)
on CodePen.
This is where the upload form actually becomes functional. You’ve got the markup and CSS ready. Now JavaScript needs to capture dropped files, validate them, and show users what they selected.
File Type and Size Validation
Always validate before upload. Checking file type and size on the client side saves bandwidth and gives users instant feedback instead of waiting for a server roundtrip.
For file type checking, compare the File object’s type property against a list of accepted MIME types. Want only images? Check for image/jpeg, image/png, image/webp. Need documents? Allow application/pdf and the relevant Office MIME strings.
For file size, set a maximum in bytes and reject anything over the limit. A common cap is 10MB for general uploads, though this depends entirely on your backend configuration.
Show clear error messages when files get rejected. Something like “This file type isn’t accepted” or “File exceeds the 10MB limit” beats a silent failure every time. Research from The Manifest shows 29% of form users abandon due to security concerns, and unclear error handling feeds that anxiety. Well-crafted form error messages reduce confusion significantly.
One gotcha: MIME type checking isn’t bulletproof. A user can rename malware.exe to photo.jpg and the browser will happily report the wrong type. Client-side validation is only half the story. Server-side checks are where real security lives.
Generating Image Previews with FileReader
The FileReader API lets you read file contents directly in the browser. For image uploads, use readAsDataURL() to generate a base64-encoded string you can set as an <img> tag’s src.
This gives users an instant thumbnail preview without uploading anything yet. They can verify they selected the right photo before committing.
For non-image files (PDFs, spreadsheets, archives), display the file name, size, and a generic icon instead. Trying to preview every file type is a rabbit hole you don’t need to go down for a basic upload form.
Store selected files in a JavaScript array. This lets users add files in batches, remove individual ones before upload, and review everything before hitting submit. Think of it as a staging area between “dropped” and “uploaded.”
Uploading Files to a Server with Fetch and FormData
The file is sitting in the browser. Now it needs to reach the server. The FormData object is the bridge between client-side file handling and server-side processing.
Tracking Upload Progress with a Progress Bar
Create a new FormData instance and append each file to it. The key you use in append() should match whatever your server expects, usually something like "files[]" for multiple file uploads.
For sending the request, you have two options. The Fetch API is the modern choice. Clean syntax, promise-based, works great for basic uploads. But it has a limitation that catches people off guard: tracking upload progress isn’t straightforward with fetch().
XMLHttpRequest is still relevant here. Its upload.onprogress event gives you loaded and total bytes in real time. Divide them, multiply by 100, and you’ve got a percentage to feed into a progress bar. Zuko Analytics data shows checkout forms take an average of 3 minutes and 21 seconds to complete. During that time, users need visual confirmation that something is happening.
A progress bar component is simple to build: a container div with a fixed width and a child div whose width is set dynamically via JavaScript as the percentage updates. Seeing form progress bar examples can help you decide on style and placement.
Handling Multiple File Uploads
Batch file uploads involve looping through your file array and either uploading them all at once (one FormData with multiple files appended) or sending individual requests per file.
Single request: Simpler on the client. Harder on the server if one file fails and you need to know which one.
Individual requests: More HTTP overhead, but each file gets its own progress bar, its own success/fail state, and its own retry logic.
Most production upload forms use individual requests. Gmail does this. Slack does this. It’s a better experience because users see granular feedback per file.
On the server side, your endpoint needs to handle multipart/form-data encoding. In Node.js, the Multer middleware for Express.js handles this parsing. PHP uses the $FILES superglobal. Python’s Flask uses request.files.
CORS can bite you if your upload endpoint lives on a different domain or subdomain. Make sure the server sends the right Access-Control-Allow-Origin headers, or the browser will silently block the request.
Adding Drag and Drop to Existing HTML Forms
Not every upload form is standalone. Sometimes you need a drop zone inside a larger form that already has text inputs, select menus, and other fields. A WordPress form with file upload capability is a common example of this pattern.
Here’s the tricky part. When you catch files via the drop event, those files exist only in JavaScript memory. They’re not automatically attached to the form’s native submit behavior.
Syncing Dropped Files with a Hidden Input
You can’t programmatically set the value of a file input (browsers block this for security reasons). Instead, the approach is to intercept the form’s submit event, build a FormData object manually, append both the regular form fields and the dropped files, then send everything with fetch() or XMLHttpRequest.
This means you’re replacing the browser’s default form submission with an asynchronous one. That’s fine. Actually, it’s better, because you get progress tracking, error handling, and the ability to keep users on the same page after upload.
Scoping Drag Events to the Drop Zone
One annoyance with drag and drop: if you don’t scope your event listeners carefully, dropping a file anywhere on the page triggers the browser’s default behavior (opening the file in the tab).
Add preventDefault() on the document-level dragover and drop events to block this. Then attach your actual file-handling logic only to the drop zone element. This gives you a safe page where accidental drops outside the zone don’t blow up the user’s session.
If you’re working with different types of forms on the same page (a contact form alongside a file upload form, for instance), this scoping becomes even more important. You don’t want a drag event on one form interfering with another.
For forms that include many fields beyond the upload, watch your overall design carefully. HubSpot data shows that each additional form field reduces conversion rates by roughly 4.1%. Keep the non-upload fields minimal and consider which form fields actually need to be there.
Libraries and Frameworks for Drag and Drop File Uploads
You don’t always need to build from scratch. Several JavaScript libraries handle the drag and drop file upload pattern out of the box, with built-in progress tracking, image previews, and file validation.
The real question is when a library makes sense versus rolling your own. If your project needs a quick, reliable file upload component and you don’t want to fight browser quirks, a library saves serious time. If you need full control over every pixel and interaction, native code is the way to go.
Download numbers from npm trends as of early 2025.
Dropzone.js Setup and Configuration
Zero dependencies. That’s the main selling point. Dropzone.js turns any HTML element into a drop zone with file previews, upload progress, and error handling baked in.
Add a class="dropzone" to a <form> element and include the library. It auto-discovers the form and starts working. Customization happens through a configuration object where you set maxFilesize, acceptedFiles, maxFiles, and callback functions for events like success, error, and thumbnail.
Snyk reports that Dropzone.js has no known direct vulnerabilities in its package, which is reassuring for production use. The tradeoff: its last major release was years ago, so active development has slowed.
Using React Dropzone in a React App
React Dropzone takes a different approach. Instead of a full UI library, it gives you a useDropzone hook that returns props for your custom drop zone element.
- You get
getRootProps()andgetInputProps()to spread onto your JSX - File handling, drag state, and accepted/rejected files come back as hook state
- No opinions about styling or upload behavior
With roughly 8 million weekly downloads on npm, React Dropzone dominates the React ecosystem for file uploads. It works well alongside your existing form UX design patterns without forcing a specific look.
Uppy is worth mentioning separately. Built by Transloadit, it supports resumable uploads through the tus protocol, pulls files from Dropbox and Google Drive, and offers a full dashboard UI. Heavier than the others, but if you need those features, nothing else comes close.
Common Bugs and How to Fix Them
Every developer building a drag and drop upload form hits the same set of bugs. They’re predictable, annoying, and (mostly) straightforward to fix once you know what’s going on.
The Flickering dragleave Problem
This one is classic. You set up a dragenter listener to highlight the drop zone. Works great until the user’s cursor moves over a child element inside the zone. The browser fires dragleave on the parent, then dragenter on the child. Your highlight flickers on and off.
Two fixes:
- Counter method: Increment a counter on
dragenter, decrement ondragleave, only remove the highlight when the counter hits zero - CSS method: Set
pointer-events: noneon all child elements inside the drop zone so they never receive drag events
GitHub’s drag-and-drop-across-browsers research documents this behavior across Chrome, Firefox, Safari, and Edge. The counter approach is the most reliable cross-browser solution.
Mobile Touch Events vs. Drag Events
Here’s a hard truth. The HTML Drag and Drop API does not work on mobile browsers.
Chrome, Firefox, and Safari on phones and tablets all ignore drag events from touchscreen input. The spec itself doesn’t clearly define what a “drag operation” is on touch devices, and no browser vendor has filled in the gaps.
Your fallback file input becomes the only upload path on mobile. Make sure it’s visible, tappable, and clearly labeled with something like “Tap to select files.” Proper form layout on mobile means the file input should be prominent, not hidden behind a drag-only interface.
Server-Side Size Limits Failing Silently
Client-side validation passes. The upload still fails. Why?
Because the server has its own file size limits that your JavaScript doesn’t know about:
- PHP:
uploadmaxfilesizeandpostmaxsizeinphp.ini - Node.js/Express: Multer’s
limits.fileSizeoption - Nginx:
clientmaxbodysizedirective (defaults to 1MB)
When these limits are exceeded, some servers return a generic error or just drop the connection. Always align your client-side maximum with your server configuration and return clear confirmation messages so users know what happened.
Security Considerations for File Uploads
File upload is one of the most exploited features in web applications. OWASP classifies unrestricted file upload as a high-severity vulnerability where code can run in the server context or on the client side.
A vulnerability in the Forminator WordPress plugin, affecting over 400,000 websites, allowed unauthenticated attackers to upload malicious files and potentially execute remote code. It got patched in version 1.25.0, but the damage window was wide. That’s what happens when upload validation is lazy.
Good form security starts with assuming every uploaded file is hostile until proven otherwise.
Server-Side Validation Is Not Optional
Client-side MIME type checks are a speed bump, not a wall. Anyone with basic dev tools can rename a file, spoof the Content-Type header, or intercept the request with a proxy tool like Burp Suite.
What actually protects you:
- Validate the file’s magic bytes (file signature) on the server, not just the extension
- Reject double extensions like
.php.jpgand null byte tricks like.php%00.jpg - Use an allowlist of permitted file types, never a denylist
The OWASP File Upload Cheat Sheet recommends checking file headers, restricting by content type, and treating the filename as untrusted input. This is a defense-in-depth approach where no single check is enough on its own. For WordPress sites, understanding how to sanitize user input in your forms is a good starting point.
Storage and Access Controls
Never store uploaded files inside the web root. If someone uploads a PHP script and the server can execute it via a direct URL, you’ve handed them remote code execution.
Move uploads to a location outside the publicly accessible directory. Better yet, push them to a cloud storage bucket on Amazon S3 or Google Cloud Storage where your web server can’t execute them at all.
Additional measures that matter:
- Rename every uploaded file to a random string (prevents path traversal and overwrites)
- Set
Content-Disposition: attachmentheaders when serving files back to users - Scan uploads with an antivirus tool like ClamAV before saving
In 2024, Edgescan reported a record 40,009 CVEs published, with web application vulnerabilities among the most critical. File upload endpoints are a direct target. Building spam prevention into your forms and hardening upload endpoints are both part of the same security posture. Protecting forms also means thinking about compliance, so review how to build GDPR compliant forms if you handle user data from EU visitors.
Making the Upload Form Accessible
Drag and drop is a mouse-only interaction. That’s a problem for the 26% of US adults who live with some form of disability, according to the CDC.
The WebAIM Million 2025 report found that 95.9% of the top million websites fail to meet basic WCAG 2.2 standards. Missing form input labels alone appeared on 45.9% of home pages. File upload forms that rely solely on drag gestures make the problem worse.
Keyboard and Screen Reader Support
The hidden file input you set up as a fallback is now doing double duty. It’s not just for old browsers. It’s the primary upload method for keyboard users and people using assistive technology.
WCAG 2.2 Level AA requires that all functionality be operable through a keyboard. The drag and drop zone itself doesn’t meet this unless you also wire up keyboard events.
Practical steps:
- Make the drop zone focusable with
tabindex="0" - Add a
keydownlistener that opens the file dialog on Enter or Space - Use
aria-describedbyto connect the drop zone with instruction text
Salesforce’s drag-and-drop component lets users press Tab to focus, Space to enter drag mode, and arrow keys to reposition items. That’s the bar for enterprise-level form accessibility.
Announcing Upload Status
Sighted users see the progress bar fill up. Screen reader users hear… nothing, unless you add ARIA live regions.
Move focus to the file list or a confirmation message after upload completes. Don’t leave the user stranded on a button that already did its job.
ADA web accessibility lawsuits exceeded 4,000 federal filings in 2024, with form functionality being a common target. Accessible upload forms aren’t just good practice. They’re a legal requirement for many organizations, especially those in government, healthcare, and education sectors.
If you’re building upload functionality into a larger site, it helps to optimize your forms for both performance and accessibility at the same time. The two goals are more aligned than most people realize.
FAQ on How To Make A Drag And Drop File Upload Form
What JavaScript events are needed for a drag and drop file upload?
Four events handle the full interaction: dragenter, dragover, dragleave, and drop. You must call preventDefault() on both dragover and drop. Otherwise the browser opens the file directly in the tab instead of capturing it.
Does drag and drop file upload work on mobile devices?
No. The HTML Drag and Drop API doesn’t support touch events on mobile browsers. Chrome, Safari, and Firefox on phones all ignore drag interactions. Always include a visible file input fallback so mobile users can tap to select files.
How do you validate file types before uploading?
Check the File object’s type property against an allowlist of accepted MIME types in JavaScript. This gives instant feedback. But client-side checks alone aren’t secure. Always validate file signatures and extensions on the server too.
Can you add a drag and drop zone to an existing HTML form?
Yes. Place the drop zone inside your <form> element alongside other fields. Intercept the submit event, build a FormData object manually, append both regular inputs and dropped files, then send everything via fetch or XMLHttpRequest.
How do you show upload progress with a progress bar?
Use XMLHttpRequest instead of fetch. Its upload.onprogress event provides loaded and total byte values. Divide them to get a percentage and update a progress bar element’s width dynamically as the upload runs.
What is the best library for drag and drop file uploads?
It depends on your stack. React Dropzone leads for React projects with roughly 8 million weekly npm downloads. Dropzone.js works framework-free. FilePond offers animated previews. Uppy handles resumable uploads and cloud sources like Google Drive.
Why does the drop zone flicker when dragging files over it?
Child elements inside the drop zone trigger dragleave on the parent when the cursor crosses them. Fix it by using an event counter that increments on dragenter and decrements on dragleave. Remove the highlight only when the counter reaches zero.
How do you handle multiple file uploads at once?
The event.dataTransfer.files property returns a FileList containing every dropped file. Loop through it, store files in an array, and either send them in one FormData request or upload each file individually with its own progress indicator.
What security risks come with file upload forms?
Unrestricted uploads can lead to remote code execution, XSS attacks, and server compromise. OWASP rates this as high severity. Validate file types server-side, rename uploaded files, store them outside the web root, and scan with antivirus tools like ClamAV.
How do you make a drag and drop upload form accessible?
Keep the file input visible for keyboard and screen reader users. Add tabindex="0" to the drop zone, wire Enter and Space keys to open the file dialog, and use ARIA live regions to announce upload progress and completion status.
Conclusion
Building a drag and drop file upload form comes down to a handful of browser APIs, some thoughtful CSS, and a commitment to doing the server-side work right. The pieces aren’t complicated individually. Getting them to work together smoothly is where the real effort lives.
Start with a solid drop zone element and proper event listeners. Add file type validation and size checks on both the client and server. Use XMLHttpRequest if you need progress tracking. Pick a library like FilePond or Uppy when the project timeline is tight.
Don’t skip security. Rename files, store them outside your web root, and validate everything server-side.
And keep accessibility in the picture. ARIA live regions, keyboard support, and a working file input fallback make your upload form usable for everyone, not just mouse users. Test across Chrome, Firefox, and Safari before shipping.

