The HTML field lets you display non-interactive content inside a form, such as instructions, headings, images, or links. Visitors can see it on the front end, but they cannot type into it or submit any values from it.
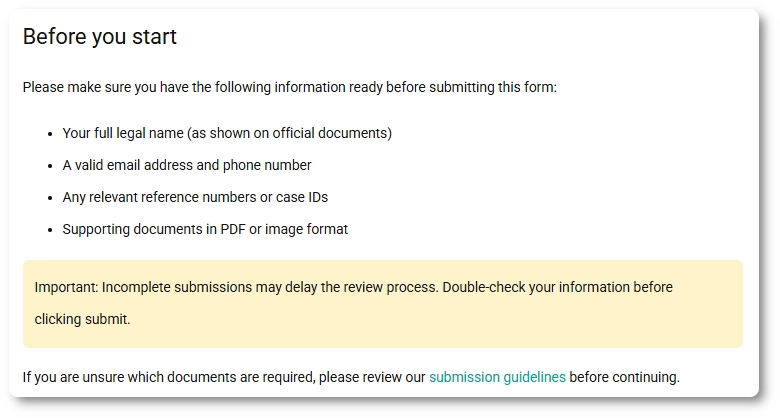
For example, you can add a short “Before you start” section at the top of a form, include a privacy notice before a checkbox, or place an image and a few bullet points above a specific group of fields so people know what to prepare before filling out the form.
What is the HTML field used for?
You can use the HTML field to show helpful content that guides users while they fill out the form, without collecting any input from them.
Add short instructions before a complex section
Show terms, disclaimers, or reminders
Separate sections using headings and spacing
Insert an image with supporting text
Add a link to an external page or internal resource
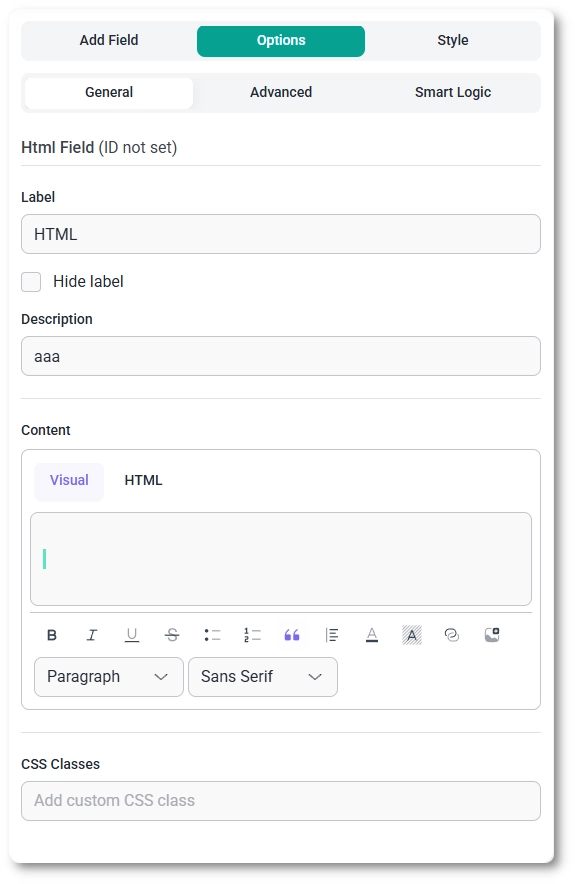
How do I add content to the HTML field?
You can add content in the Content area using either the Visual editor or the HTML tab.
The visual editor is powered by Tiptap, which lets you format content without writing code. If you need full control, switch to the HTML tab and paste raw HTML directly.
Which formatting options are available in the visual editor?
The visual editor supports common formatting controls so you can build clean, readable info blocks.
Text styles: Paragraph and Heading 1 to Heading 6
Lists: bullet list and numbered list
Text emphasis: bold, italic, underline, strikethrough
Quotes: blockquote styling
Alignment: left, center, right
Colors: text color and background color
Links: add clickable hyperlinks
Media: insert an image into the content
For fonts, you can select from the supported families: Sans serif, Inter, Comic Sans MS, Serif, Monospace, Cursive.
What do Label, Hide label, and Description do?
These settings control how the field is presented around your content.
Label sets the field name shown above or beside the content, depending on label position
Hide label removes the label from the front end while keeping the field in the form layout
Description shows helper text below the field, useful for short clarifications
How do CSS Classes work for the HTML field?
The CSS Classes option lets you add one or more custom classes to the field so you can target it with custom styling on the front end.
Use this when you want to style only this HTML block, for example to add custom spacing, borders, or typography through your theme or custom CSS.
How do I change the label position for the HTML field?
You can change label placement from the Advanced tab.
Set Label position to one of the following:
Default
Top
Left
Right
This only affects the label placement. It does not change the content layout inside the HTML editor.
Can I show or hide the HTML field using Smart Logic?
Yes. In the Smart Logic tab, you can set conditions that control when the HTML field appears on the front end.
This is useful when you want to display different instructions based on earlier answers, such as showing a note only if someone selects a specific option, or revealing a reminder once a checkbox is enabled.
What are the do’s and don’ts for the HTML field?
Do use the HTML field for instructions, headings, images, and links that help users complete the form
Do use Smart Logic to show only the content that matches the user’s choices
Do use CSS Classes if you need to target this block with custom styling
Don’t use the HTML field to collect information; it cannot be filled in on the front end
Don’t paste complex or risky markup if you can achieve the same result in the visual editor; keep it simple and readable
Don’t rely on the HTML field for critical navigation; keep key actions in actual input fields and buttons
Guides
Explore the IvyForms documentation through key sections like Get Started,
Form Creation, Entry Management, Settings, Integrations, Advanced Features,
and Support & Troubleshooting to make the most of your form-building experience