The Mailchimp integration in IvyForms lets you send form submissions directly to your Mailchimp audience. Once connected, you can map IvyForms fields to Mailchimp fields, so new contacts are added or updated automatically. This article explains how to enable the integration, connect your Mailchimp account, and set up field mapping inside a form.
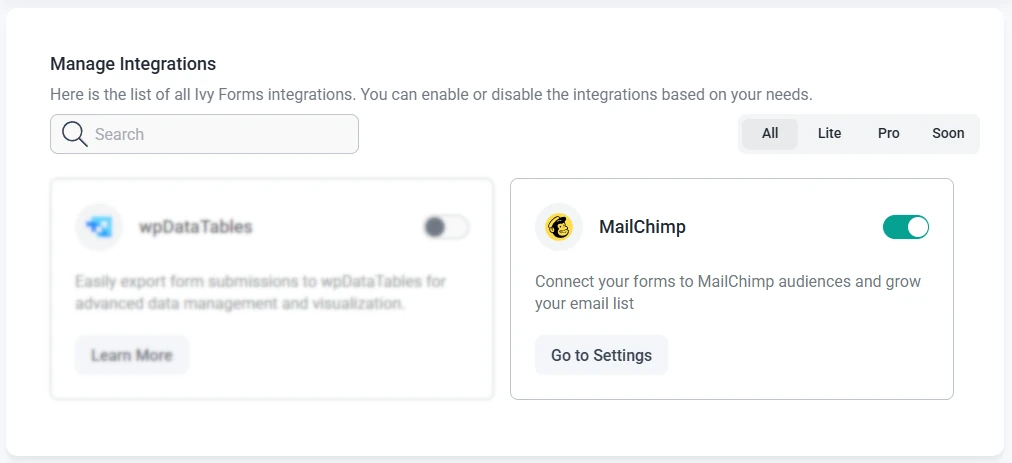
Mailchimp integration in the IvyForms Integrations page
Where can I enable the Mailchimp integration in IvyForms?
To get started, open the IvyForms → Integrations menu in your WordPress dashboard. In the list of available integrations, locate Mailchimp and enable it using the toggle next to its name.
When Mailchimp is disabled, you will see a Learn more button. As soon as you enable the integration, this button changes to Go to settings. Clicking either Go to settings or navigating to IvyForms → Settings → Integrations → Mailchimp will open the same configuration screen where you can connect your Mailchimp account.
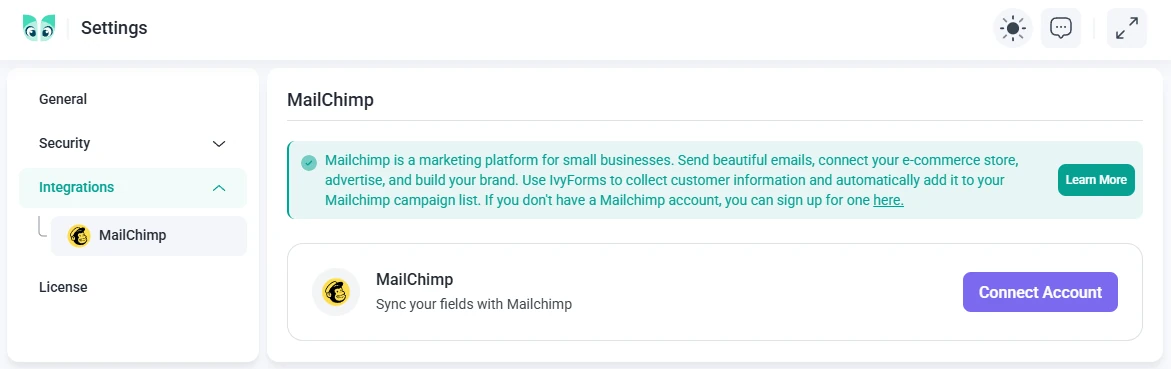
How do I connect my Mailchimp account to IvyForms?
Before you can use Mailchimp with IvyForms, you need an active Mailchimp account. IvyForms only provides the integration layer, so creating and managing the Mailchimp account itself is handled entirely on Mailchimp’s side.
In IvyForms → Settings → Integrations → Mailchimp, click the Connect account button. This opens a Mailchimp login window where you can either log in to your existing account or create a new one using Mailchimp’s own interface.
Any issues with creating, verifying, or managing your Mailchimp account should be directed to Mailchimp support, since IvyForms only controls the connection, not the account itself.
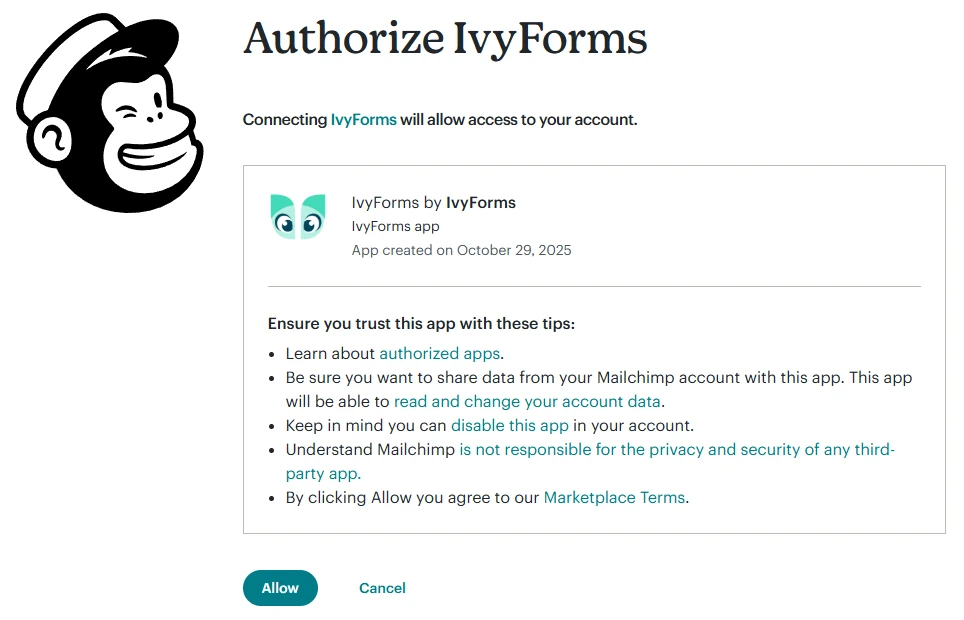
After you log in to Mailchimp, you will see a permissions screen. Click Allow to let IvyForms access your Mailchimp account. Once approved, IvyForms can read your audiences (lists) and send contact data to the audience you select in each form.
The Mailchimp integration in IvyForms requires you to log in using your Mailchimp username. Logging in with your email address is not supported through the integration window.
How do I enable Mailchimp for a specific IvyForms form?
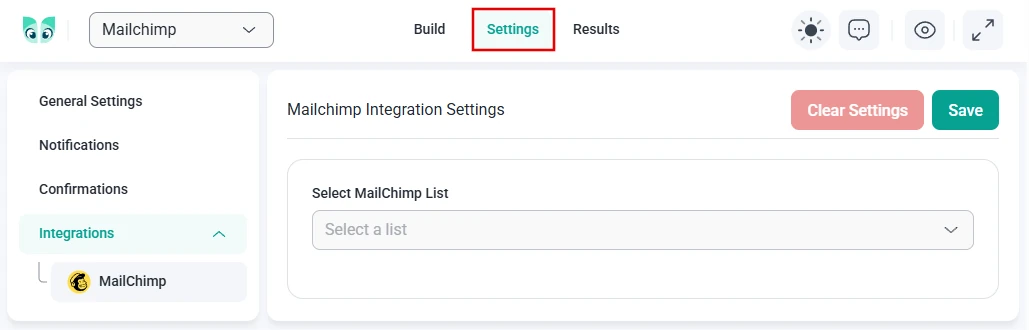
The global connection gives IvyForms access to your Mailchimp account, but you still need to enable Mailchimp on each form where you want to send contacts. This is done in the form’s settings.
When editing a form, open the Settings tab at the top (between Build and Results). In the left panel, go to Integrations → Mailchimp. Here you can:
Select which Mailchimp Audience (list) this form should send data to.
Map fields from IvyForms to fields in your Mailchimp audience.
The Mailchimp audience you want to use must already be created in Mailchimp before you can select it in IvyForms.
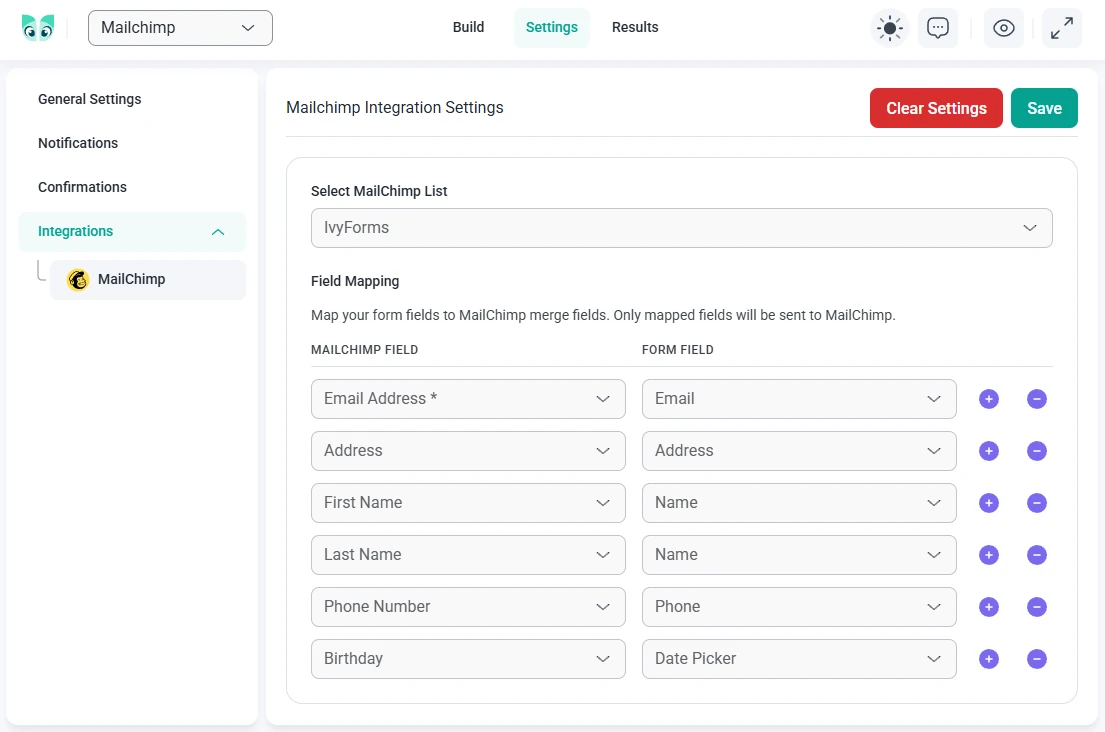
How does field mapping between IvyForms and Mailchimp work?
Field mapping tells IvyForms which form fields should populate which Mailchimp fields. Once you select a Mailchimp audience, IvyForms loads the first available Mailchimp field. To map additional fields, click the + button on the right to add another row. After a new row is added, each row will display both + and – icons. The – icon removes that specific mapping row, while the + icon adds a new one below it.
Common mappings include:
Email ↔ Email – map your IvyForms Email field to Mailchimp’s email address field.
First name ↔ Name (IvyForms) – map a dedicated IvyForms Name field to the First name field in Mailchimp.
Last name ↔ Name (IvyForms) – map another IvyForms Name field to the Last name field in Mailchimp.
Birthday ↔ Date – map a Mailchimp birthday field to an IvyForms Date field.
Phone number ↔ Phone – map a Mailchimp phone field to an IvyForms Phone field.
Address ↔ Address – map the Mailchimp address field to an IvyForms Address field.
How should I set up name fields for Mailchimp?
Mailchimp separates names into First name and Last name fields. In IvyForms, the Name field is flexible, so to map names correctly, you should add two Name fields to your form:
One Name field that collects only the first name.
Another Name field that collects only the last name.
In the Mailchimp integration panel, map the first IvyForms Name field to Mailchimp’s First name, and the second IvyForms Name field to Last name. This way, both values are stored correctly in your Mailchimp audience.
How should I map the address field for Mailchimp?
Mailchimp has a dedicated Address field type that expects structured address data. To fill this field from IvyForms, you need to use the Address field in your form. A simple Text field (or any other basic input) will not populate the Mailchimp address field correctly.
When mapping fields, select your IvyForms Address field on the IvyForms side and the Mailchimp Address field on the Mailchimp side. This ensures that all address parts are sent and stored in the expected format.
Why is Mailchimp rejecting my test data from IvyForms?
Mailchimp applies strict validation to some of its fields. If the data coming from IvyForms does not meet Mailchimp’s requirements, the submission can be rejected without showing any errors in your form. The entry will still appear in IvyForms, but it will not be added to your Mailchimp audience. This most often happens with:
Email addresses – Mailchimp does not accept obviously fake email addresses.
Addresses – random text or incomplete data.
Dates – invalid or incorrectly formatted dates can be rejected by date fields such as birthdays.
When testing, use real values for email, address, and date fields. If Mailchimp still rejects submissions, double check your field mapping and the field types used in your Mailchimp audience, and update the form fields in IvyForms to match them.
Guides
Explore the IvyForms documentation through key sections like Get Started,
Form Creation, Entry Management, Settings, Integrations, Advanced Features,
and Support & Troubleshooting to make the most of your form-building experience