Installing IvyForms is quick and straightforward. You can install the Lite version directly from the WordPress plugin directory, or you can download the Pro version after purchasing it from our website. Both editions support the same installation methods, and no technical knowledge is required.
In the sections below, you’ll learn how to install IvyForms Lite from the WordPress dashboard, how to upload the Pro version after purchase, and how to install any version manually via FTP.
To use any Pro features, you’ll need to activate your license code in IvyForms → Settings → License. Until the license is activated, the Pro features will remain unavailable.
How can I install IvyForms from the WordPress dashboard?
You can install IvyForms Lite directly from your WordPress admin area by searching for it in the plugin directory. This method applies only to the Lite version.
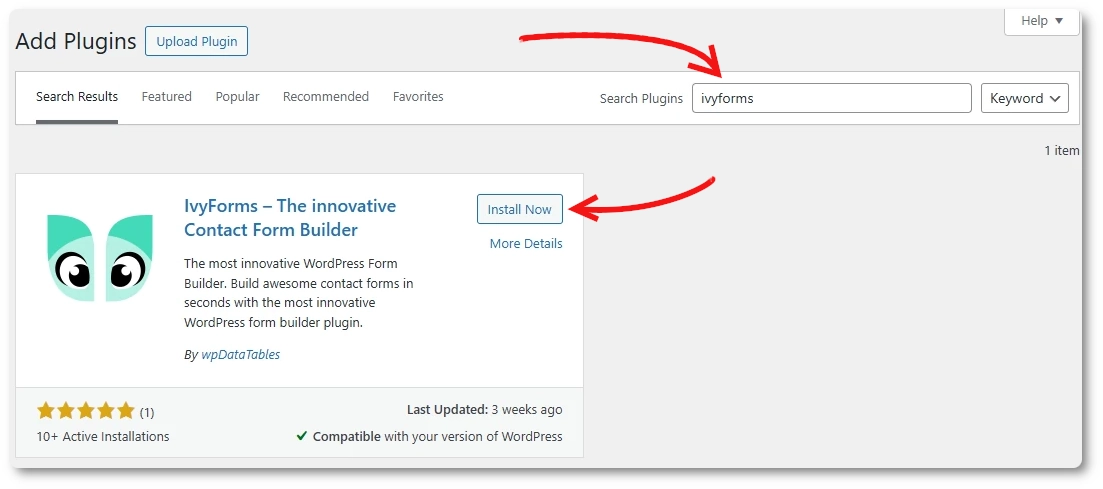
Option 1: Install IvyForms Lite from the WordPress Plugin Directory
Go to Plugins → Add New.
Type IvyForms (no spaces) into the search bar.
Click Install Now once the plugin appears.
When the installation completes, click Activate.
You can continue using the Lite version as long as you want. If you decide to upgrade to Pro, the installation process stays exactly the same – you’ll simply upload the Pro ZIP file instead of installing from the directory.
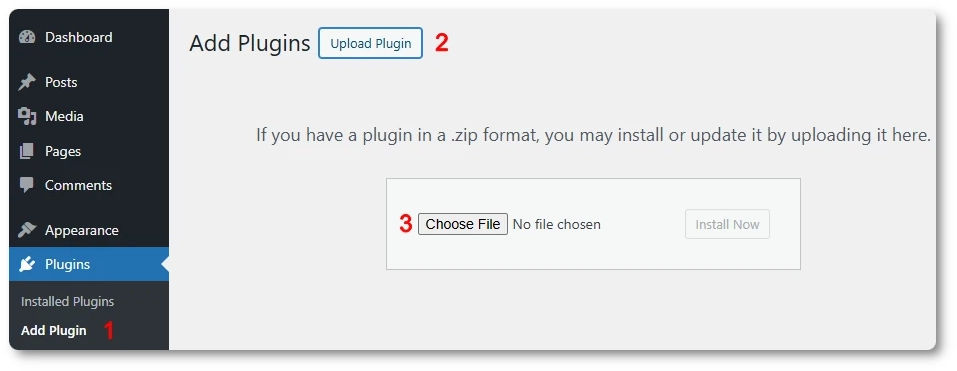
Option 2: Upload IvyForms Pro or IvyForms Lite manually
This method works for both Lite and Pro.
After purchasing IvyForms Pro on ivyforms.com, you’ll receive an email containing:
Your download link for the Pro ZIP file (valid for 5 downloads or 30 days).
A link to your customer account at store.melograno.io where you can re-download the plugin and view your license code.
To upload the plugin:
Go to Plugins → Add New.
Click Upload Plugin.
Select the ivyforms.zip file.
Click Install Now.
When the installation finishes, click Activate Plugin.
The plugin will now appear in your plugin list and in the IvyForms menu on the left-hand side.
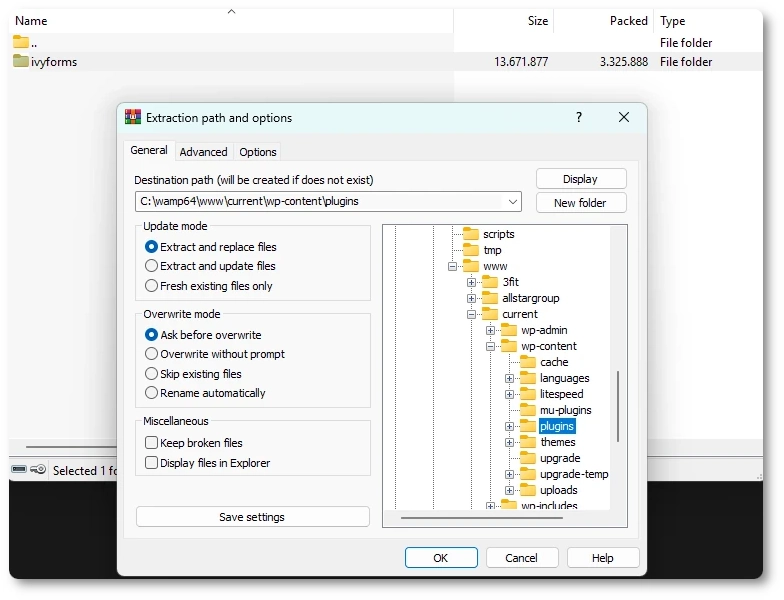
How can I install IvyForms via FTP?
This method is useful if you prefer manual control or if you can’t access the WordPress dashboard for some reason.
Download the IvyForms ZIP file and extract it on your computer.
Connect to your website via FTP (using FileZilla or another FTP client).
Navigate to the /wp-content/plugins/ directory.
Upload the extracted ivyforms folder there.
Go to your WordPress dashboard → Plugins, and click Activate next to IvyForms.
If you see the “The link you followed has expired” message while uploading the plugin, it usually means your server’s upload limits are too low.
Please check the following PHP settings:
upload_max_filesize
post_max_size
max_execution_time
If you’re not comfortable changing these values, contact your hosting provider and ask them to increase the limits for you.
What’s next?
Now that IvyForms is installed, it’s time to configure it for your website. You can review basic settings, enable email notifications, and adjust default styling before building your first form.
Guides
Explore the IvyForms documentation through key sections like Get Started,
Form Creation, Entry Management, Settings, Integrations, Advanced Features,
and Support & Troubleshooting to make the most of your form-building experience