Once IvyForms is installed and activated, you can configure its main options directly from your WordPress dashboard.
At this stage, IvyForms includes three configuration areas, General settings, security settings, and License settings. General and reCAPTCHA settings control accessibility and spam protection. The License tab is used to activate the Pro version of IvyForms. You can find full activation instructions here: activating your IvyForms license.
Pro features remain unavailable until the license is activated.
Where can I find the settings in IvyForms?
You can open all IvyForms configuration options by navigating to WordPress Dashboard → IvyForms → Settings.
Inside this page, you’ll see the following tabs:
General – accessibility and backend layout controls.
Security – reCAPTCHA, hCaptcha, and Turnstile settings.
License — activate your IvyForms license key to unlock all Pro features. Full instructions are on the license activation page.
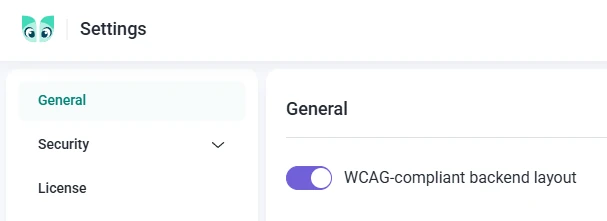
How can I enable WCAG-compliant layout?
You can enable WCAG accessibility in the General tab. The toggle named WCAG-compliant backend layout updates the interface to follow WCAG (Web Content Accessibility Guidelines) standards, which improves keyboard navigation and screen-reader support.
This option is recommended for anyone who wants improved accessibility in the WordPress admin area.
How do I enable Google reCAPTCHA in IvyForms?
You can enable Google reCAPTCHA under the Security tab. This feature helps protect your forms from spam and automated submissions. Follow these steps:
Select your preferred reCAPTCHA version:
reCAPTCHA v2 – displays the “I’m not a robot” checkbox.
reCAPTCHA v2 Invisible – verifies legitimate users in the background.
reCAPTCHA v3 – score-based spam detection with minimal user interaction.
Enter your Site Key and Secret Key in the corresponding fields.
Select your preferred reCAPTCHA language.
Click Save Changes to apply the settings.
Some languages in the dropdown are marked with an asterisk (*). The asterisk indicates that the audio challenge is only available for the Checkbox widget.
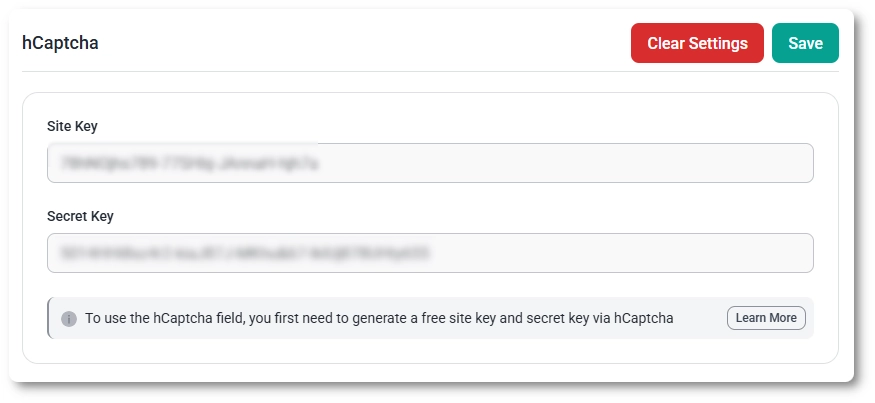
hCaptcha helps protect your forms from spam and automated submissions while respecting user privacy. You can enable it directly from the hCaptcha tab in the form settings.
Generate a free Site Key and Secret Key in your hCaptcha account.
Enter the generated keys into the corresponding fields.
Click Save Changes to apply the settings.
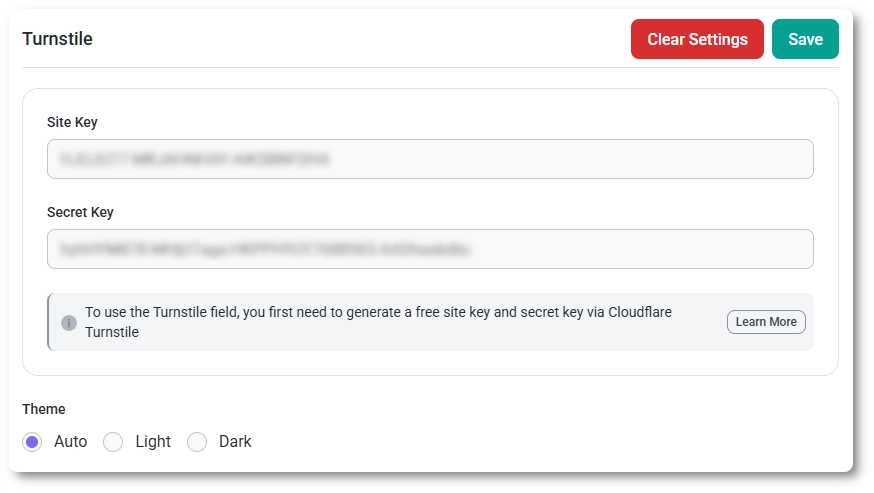
How do I enable Cloudflare Turnstile in IvyForms?
Cloudflare Turnstile provides spam protection without interactive challenges for most users. You can enable it from the Turnstile tab in the form settings.
Create a free Turnstile widget in your Cloudflare dashboard to obtain a Site Key and Secret Key.
Enter the keys into the appropriate fields in IvyForms.
Select the preferred Theme (Auto, Light, or Dark).
Click Save Changes to activate Turnstile protection.
What happens after I configure these options?
All settings you save will be applied globally across IvyForms. Any new form you build will automatically inherit your accessibility and spam-protection preferences.
When your license is activated, all Pro templates, fields, and advanced features become available throughout the plugin.
That’s all for the initial setup. More configuration options and integrations will be introduced in future versions of IvyForms. In the meantime, you can jump straight into building forms using our form templates designed for different outcomes.
Guides
Explore the IvyForms documentation through key sections like Get Started,
Form Creation, Entry Management, Settings, Integrations, Advanced Features,
and Support & Troubleshooting to make the most of your form-building experience