The Time field is used to capture specific time values, such as appointment times, opening hours, or deadlines. It supports different input styles and formats, so you can match the way time is displayed to your audience. This article explains how the Time field works and how you can configure it in the IvyForms builder.
Front-end appearance
Where can I find the time field in IvyForms?
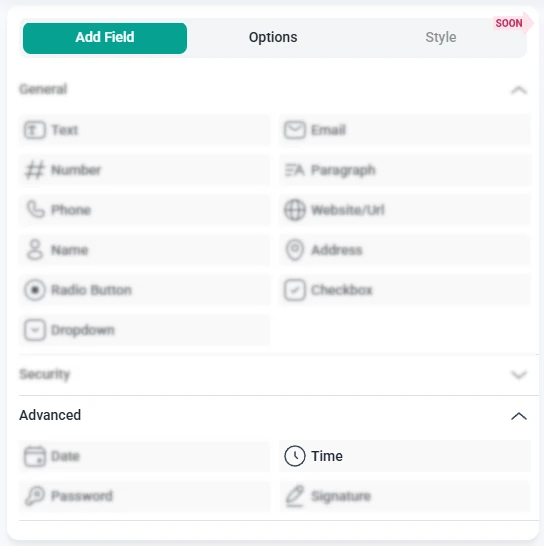
You can add the Time field from the Advanced section in the left panel of the IvyForms builder. When you open this section, you will see the Time field next to Date, Password, and Signature. Click the Time option to insert it into your form, then select it in the preview to access its configuration options.
What settings can I configure for the time field?
After you click the Time field in the preview, the sidebar switches to the Options view. Here you can adjust settings in three areas: General, Advanced, and Smart logic. These control how the field looks, how time values are entered, and when the field appears on the form.
How do general settings work for the time field?
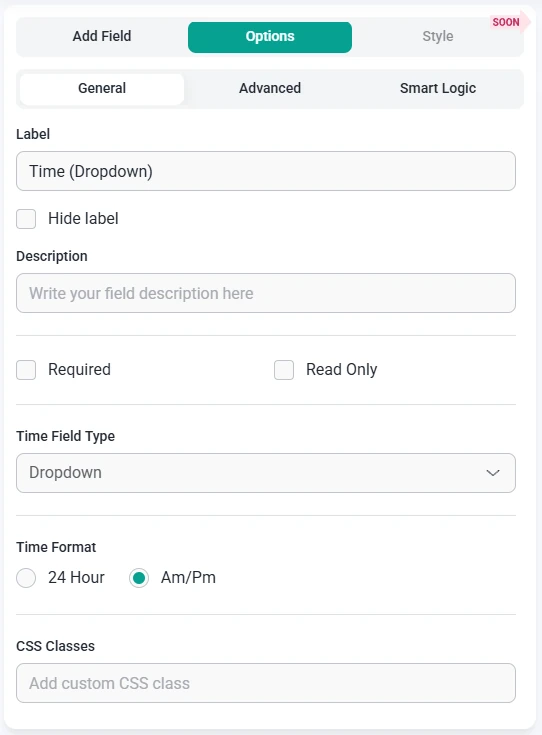
The General tab contains the main options that define the appearance and basic behavior of the Time field. This is where you set the label, choose the input style, pick a time format, and decide whether the field is required.
Label – sets the text shown next to the time input, for example “Start time” or “Preferred contact time”.
Hide label – removes the visible label on the front end while keeping the Time field itself available.
Description – adds a short explanation below the field, such as “Select a time between 9 am and 6 pm”.
Required – makes the Time field mandatory so users must choose a valid time before submitting the form.
Read-only – shows a fixed time value that users cannot change.
Placeholder – displays example text when the Time field is empty. This option is available for field types that use a single input, such as time picker or time input.
Time field type – defines how users select or enter the time:
Time (Picker) – shows a picker control where users can choose hours and minutes from a single dropdown.
Time (Dropdown) – splits the time into separate dropdowns for hours, minutes, and, when needed, an AM or PM selector. When this type is selected, the placeholder setting is not used because the value is chosen from dropdowns.
Time (Input) – provides a simple input field where users can type the time directly.
Time format – chooses how time values are displayed. You can switch between a 24 hour format and an AM/PM format so the field matches your regional or project preference.
CSS classes – lets you add one or more custom class names that you can target with your own CSS for styling and layout adjustments.
How do advanced settings work for the time field?
The Advanced tab lets you fine tune how the Time field is prefilled and how its label is positioned. The settings in this tab work together with the chosen Time field type, so the way you select values here matches the input style you picked in the General tab.
Default value – sets an initial time that appears when the form loads. The way you choose this value depends on the active Time field type. For a picker, you select hours and minutes in the picker control. For time dropdowns, you choose the values from the hour, minute, and AM or PM dropdowns. For the time input, you type the default time directly into the input field.
Label position – controls where the label appears relative to the Time field. You can keep the Default placement or move the label to the Top, Left, or Right so it fits the layout of your form.
How can I use smart logic with the time field?
Smart Logic is available only in the Pro version of IvyForms.
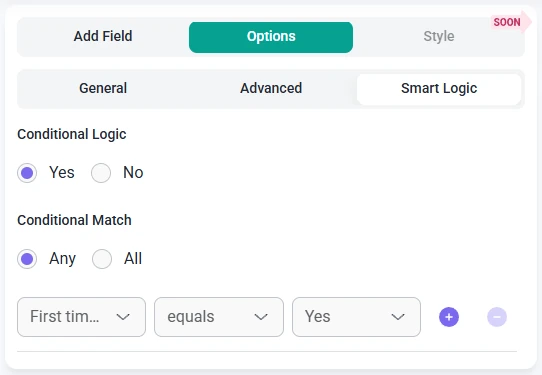
The Smart logic settings allow you to display the Time field only when certain conditions are met. By default, the field is always visible. Once you enable smart logic, you can create rules based on other answers in the form that determine when the Time field should appear.
When smart logic is turned on, the Conditional match control lets you choose how the rules are evaluated:
Any – the Time field is shown if at least one of the conditions you define is true.
All – the Time field is shown only when every configured condition is satisfied at the same time.
These conditions use values from other fields in your form. For example, you can show the Time field only after someone chooses a specific service from a dropdown, selects a time based option in a Radio button field, or indicates that they want to schedule a call. This keeps your forms tidy by asking for a time only when it is relevant to the user’s previous input.
Guides
Explore the IvyForms documentation through key sections like Get Started,
Form Creation, Entry Management, Settings, Integrations, Advanced Features,
and Support & Troubleshooting to make the most of your form-building experience